
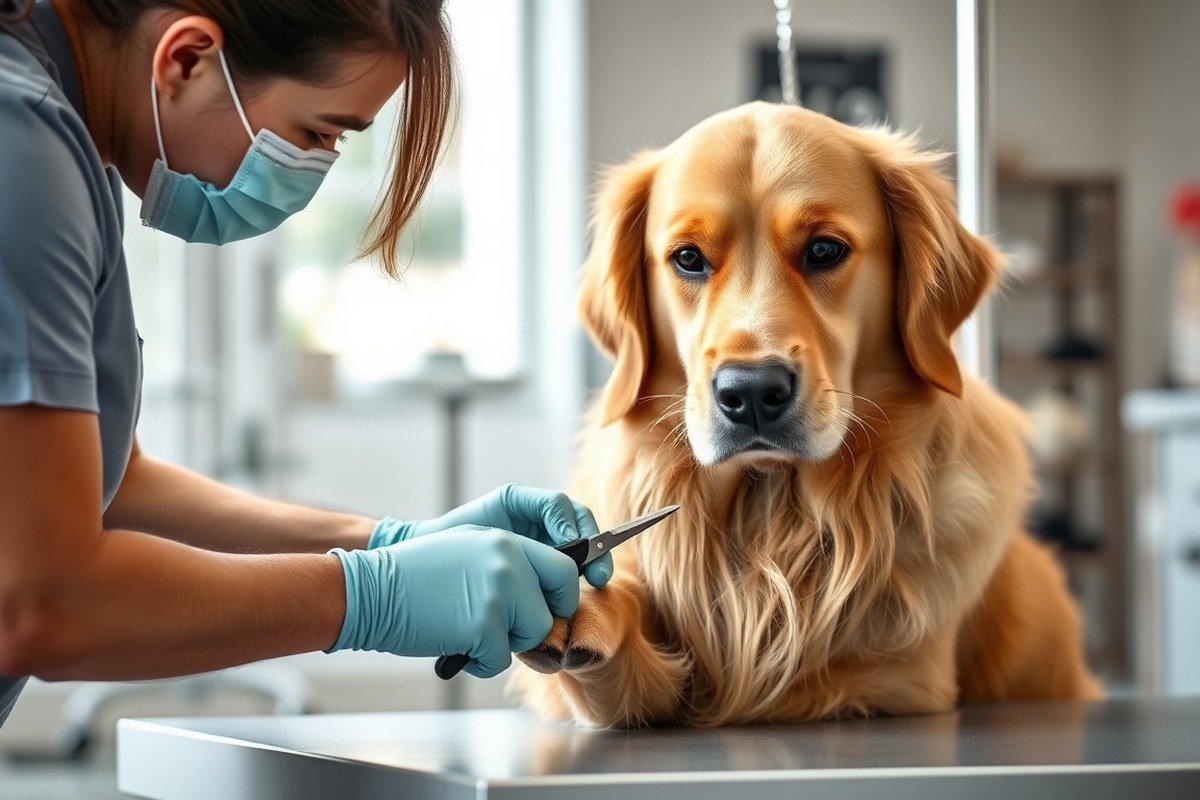
How Do Dog Groomers Trim Nails? A Complete Guide with Expert Tips
Dog groomers trim nails by using specially designed clippers, cutting at a 45-degree angle from underneath the nail to avoid injury. They trim a little at a time and use calming techniques for anxious dogs. This method keeps nails healthy and reduces the risk of pain or bleeding.
This information is for dog owners who want to understand professional nail trimming practices. You’ll learn about the tools groomers use, step-by-step instructions, and how they handle difficult situations safely and effectively.
Key Takeaways
- Use dog-specific clippers shaped for cupped nails to trim safely and effectively.
- Trim nails at a 45-degree angle, cutting from underneath with the blade facing you.
- Most dogs need nail trims every 3 to 6 weeks, depending on activity and nail growth.
- Cut your dog’s nails gradually to prevent hitting the quick and hurting them.
- Introduce clippers gradually by letting your dog sniff and see them over days.
- For anxious dogs, use calming techniques like gentle restraint and treats during trimming.
How Dog Groomers Trim Nails Step by Step

Trimming a dog’s nails requires a careful, step-by-step routine to avoid cutting the quick, which can cause pain and bleeding. Professional dog groomers trim nails gradually, cutting small amounts at a time and using a roughly 45-degree angle. They often trim from underneath the nail with the blade facing themselves, not the dog, to maintain control. Keeping the nail length short but safe helps improve the dog’s comfort and hygiene without causing injury.
- Prepare the dog and tools. Secure your dog calmly in a comfortable position. Have the appropriate nail clippers or grinder ready. For safety, use tools sized correctly for your dog’s nail thickness and consider a clipper equipped with a quick sensor for extra caution.
- Examine each nail carefully. Identify the quick if visible; this is easier in light-colored nails. For dark nails, trim small amounts to avoid accidentally cutting the quick. A good approach is to trim a little and then pause to check progress.
- Hold the paw firmly but gently. This keeps the dog steady and reduces sudden movements. Proper grip helps you control the trimming angle and position.
- Trim the nail at about a 45-degree angle. Cut from underneath with the clipper blade facing you. Use slow, steady pressure to cut only the dead nail portion. Avoid splitting or shredding the nail by using sharp, clean blades.
- Trim in small increments. Stop after cutting a tiny bit, especially on nails with an unclear quick. This gradual approach allows the quick to recede over several trims safely.
- Use a nail grinder if preferred. Grinding smooths edges and reduces the risk of cutting the quick. It’s also helpful for dogs sensitive to clippers and can shape the nail gradually.
- Check each nail after trimming. Look for a smooth and slightly rounded tip to prevent snagging or injury. Avoid nails that are cut too short, which risks bleeding. Allow breaks to let your dog relax between nails if needed.
- Reward your dog and monitor the paws. Offer praise or a treat to create a positive association. Inspect paws regularly for signs of discomfort or nail damage after each session.
Following this process repeatedly every 4 to 6 weeks helps keep nails healthy and comfortable. Gradual, careful trimming encourages the quick to shrink over time, allowing shorter trims in future sessions. Avoid rushing or cutting too far, especially if you are new to nail trimming, to minimize the chance of injury or stress for your dog.
Tools Professionals Use for Dog Nail Trimming

Professional dog groomers commonly rely on several key tools for trimming nails: nail clippers, nail grinders, and nail files. Each tool has distinct uses based on the dog’s nail type, size, and behavior during grooming. Choosing the right tool helps prevent injuries to the quick, the blood vessel inside the nail, and ensures a smooth and comfortable trimming experience.
Nail clippers are the most frequently used tool. They come in various styles, including scissor-style, guillotine-style, and plier-style, each designed for specific nail sizes and thicknesses. These clippers allow groomers to make precise, straight cuts on dogs with softer or average nails. For dogs with thick or tougher nails, nail grinders, electric or manual, are preferred. Grinders file down the nail gradually, reducing the risk of splitting or cracking.
| Tool | Description | Best Use |
|---|---|---|
| Nail Clippers | Come in scissor, guillotine, and plier styles; designed specifically for dog nails of different sizes. | Ideal for dogs with softer nails or when a quick, clean cut is needed. |
| Nail Grinders | Electric or manual tools that gradually grind and smooth nails. | Suitable for dogs with thick, hard nails or those needing gradual nail reduction. |
| Nail Files | Used to smooth rough edges after clipping or grinding. | Applied to shape and finish nails, especially after nail grinders or clippers. |
Nail files are typically not the primary trimming tool but serve an important role in finishing the grooming process. After clipping or grinding, files smooth sharp or jagged edges to prevent nails from snagging on fabric or scratching the dog. Groomers frequently complete the trim with filing, particularly for dogs that may be sensitive to the sensation of nail grinders or clippers.
Using grinders gradually reduces the nail length and can make trimming less intimidating for dogs who resist clipping. However, grinders require patience and steady handling to avoid causing heat buildup from friction. Clippers, on the other hand, offer a quicker trim but need careful precision to avoid cutting the quick, especially in dogs with dark nails where the quick isn’t visible.
Always check the tool’s sharpness before starting, as dull clippers or files increase the risk of nail splitting and discomfort for the dog.
Techniques to Safely Trim Black or Dark-Colored Nails
Groomers trim black or dark-colored dog nails by carefully shaving thin layers to reveal the quick without cutting it. Because the quick isn’t visible in dark nails, they look for subtle signs like a small dark dot or change in texture. Trimming in small increments helps avoid pain and bleeding.
Examining and Feeling the Nail Before Trimming
Before trimming, groomers carefully inspect each nail under good lighting. They gently press on the nail to feel for softness or changes that may indicate where the quick lies inside. The nail’s thickness and texture can offer hints about how much to trim.
Feeling the nail helps avoid cutting into the sensitive quick, which contains blood vessels and nerves. This is especially important with black nails because the quick can’t be seen, so physical feedback guides safe trimming.
Gradually Shaving Thin Slivers to Spot the Quick
Groomers usually trim black nails by shaving off very small slivers rather than clipping large pieces at once. This technique allows them to check the freshly cut surface after every shave for signs of the quick.
Using a nail grinder or fine clippers, they carefully file or clip the nail in thin layers. After each pass, they look for a small dark dot in the middle of the nail’s cross-section, which typically means the quick is close. Seeing this dark spot is a signal to stop trimming to prevent injury.
For nails that are severely overgrown, trimming may be spread over multiple sessions. This slow approach encourages the quick to recede over weeks, allowing shorter nail lengths safely.
Knowing When to Stop Safely
Stopping at the right moment avoids pain and bleeding. Once a small dark dot appears or the nail’s inner color shifts, groomers stop trimming immediately. This usually means they have reached the edge of the quick.
If the dog flinches, pulls away, or shows discomfort, groomers check the nail carefully for signs they are too close to the quick and adjust. Keeping styptic powder nearby helps quickly manage any accidental nicks. Trimming just a tiny bit regularly, rather than all at once, maintains the nails at a safe length and reduces the risk of hitting the quick in future sessions.
- Choose a quiet, well-lit area to comfortably examine your dog’s nails.
- Gently hold the paw and press on each nail to sense its firmness and feel for softness that may mark the quick’s location.
- Use a nail grinder or sharp dog nail clippers designed for gradual trimming.
- Shave off thin slivers from the tip, checking the freshly cut surface after each pass.
- Stop trimming when a small dark dot or inner color change appears, indicating the quick is nearby.
- Watch your dog’s reactions for signs of discomfort or pain, and pause if any appear.
- Repeat this process weekly to allow the quick to recede and safely shorten nails over time.
How Groomers Handle Anxious or Uncooperative Dogs
Groomers handle anxious or uncooperative dogs by creating a calm environment and using patient, step-by-step techniques. Staying gentle and positive helps reduce stress and resistance, making nail trims safer and less scary. Tailored approaches such as gradual exposure, gentle handling, and strategic use of treats ensure even fearful dogs can become comfortable over time.
Building Trust Through Gentle Handling and Praise
Trust is the foundation for calm nail trimming. Groomers begin by softly handling the dog’s paws without trimming, allowing the dog to relax and adjust to touch. Gentle, steady pressure on specific points can help keep the dog calm and still. Praise spoken in a soft, encouraging tone reinforces feelings of safety. Avoid rushing the dog; moving at its pace shows respect and prevents panic that can lead to aggression or escape attempts.
For example, groomers will quietly say, “Good job, nice and calm,” while stroking the dog’s paw. This approach helps the dog associate the grooming space and the sensation of paw handling with a positive experience. Practicing these steps daily leads to smoother sessions and more cooperative behavior over time.
Using Gradual Exposure and Short Trimming Sessions
Breaking down the nail trimming into small, manageable parts reduces anxiety. Groomers trim one or two nails per session, gradually increasing as the dog becomes more comfortable. This step-by-step exposure prevents overwhelming the dog and keeps sessions short, often lasting only a few minutes early on. If the dog resists or shows signs of fear, the groomer pauses and resumes only when the dog is calm again.
For puppies or fearful dogs, this approach might mean holding off on clipping and simply handling paws until the dog relaxes. Repeated brief sessions build familiarity without creating negative associations. Rushing or forcing a dog who is scared often causes them to resist more in the future and could lead to biting or other defensive behavior.
Employing Treats and Positive Reinforcement
Treats work as powerful tools to reward calm and cooperative behavior. During nail trims, groomers frequently give small, soft treats after clipping each nail, praising the dog verbally to create a positive link. Using a lick mat spread with dog-safe peanut butter can distract the dog and keep it engaged during the process. This distraction lowers anxiety and focuses the dog on something enjoyable instead of the trimming.
Positive reinforcement also means never yelling or punishing the dog, which would only increase its fear. Instead, groomers encourage owners to start training at home by giving treats and praise with every paw handling session. For dogs that remain severely anxious, professional groomers may suggest consulting a veterinarian for prescribed anti-anxiety medication or assistance from a vet tech for safer, less stressful trims.
Stopping Bleeding and Managing Nail Trim Injuries
When a groomer accidentally cuts the quick in a dog’s nail, stopping the bleeding quickly is critical. The quick is the sensitive area inside the nail with blood vessels, and cutting it causes bleeding and pain. Groomers keep styptic powder or pet nail clotting gel nearby to stop bleeding fast. Styptic powder, commonly made from an astringent like alum, works by contracting blood vessels and clotting blood to seal the wound. Applying it immediately reduces bleeding time from about 5 minutes to under a minute.
To use styptic powder correctly, first stay calm to avoid stressing your dog. Then cover the bleeding nail tip with the powder or press the powder into the nail using a fingertip. Another option is dipping the nail briefly into the powder. Hold steady pressure for a few seconds. If blood continues after 10 minutes, consult a vet as the injury may need professional care. Groomers often carry cornstarch as a backup, but styptic powder is generally more effective.
Applying pressure alone without powder can eventually stop bleeding but takes considerably longer and creates more discomfort. Most groomers trim nails in small increments, around 1 to 2 millimeters at a time, staying at least 2 millimeters away from the quick if it’s visible. This technique helps prevent hitting the quick, but accidents can still happen, especially with dark or black nails where the quick is hard to see.
- Keep styptic powder or clotting gel within reach before trimming starts
- Cut small amounts per trim, about 1 to 2 mm, to avoid quick damage
- Apply styptic powder immediately after cutting too short
- Hold pressure on the nail with powder for 10 to 30 seconds to stop bleeding
- Stop trimming and calm your dog if bleeding occurs
- Reward your dog to build positive associations despite the mishap
- Consult a vet if bleeding lasts longer than 10 minutes or if the nail appears broken
Injuries beyond minor quick cuts, like broken nails or deep wounds, require different first aid and veterinary attention. Groomers often use nail trimmers with built-in quick sensors to help prevent overcutting. Remaining calm and well-prepared is key to managing nail trim injuries safely and effectively.
Always keep styptic powder ready and apply it immediately if you see bleeding to minimize pain and prevent infection.
How Often and When Do Groomers Trim Dog Nails?
Professional dog groomers usually trim nails every 3 to 4 weeks. This timing fits most dogs because nail growth varies by individual, and the activity level plays a key role. Dogs that walk frequently on hard surfaces like pavement often wear down their nails naturally, which means they need trims less often. On the other hand, indoor or less active dogs tend to have faster nail growth and need more frequent trimming to avoid issues.
Groomers decide when to trim nails by regularly inspecting the dog’s nails at each visit. They look for nails touching or pressing against the floor when the dog stands or nails that start curling or clicking on hard floors. These signs show the nails have grown too long and need trimming to prevent discomfort or injury. Long nails can make walking painful and may contribute to joint problems.
Each dog’s activity level and nail growth rate create the decision rule groomers follow: trim when the nails interfere with normal walking or show signs of overgrowth. You can apply this rule too. Check your dog’s nails once a week. You can tell it’s time to trim when you hear clicking on floors or notice nails touching the ground. Some dogs need professional trims as often as every three weeks, while more active dogs might only need them every 5 to 6 weeks.
Dogs with dark nails need special attention since it’s harder to see the quick, which grows with the nail. Groomers who work with dogs regularly watch for changes in nail shape or length rather than relying on color alone. Nail grinders are preferred for these dogs because they allow a gradual trim, reducing the risk of cutting too close and causing pain. This method takes more time but offers precision and safety.
For dogs new to regular nail trims or those with very long nails, groomers take extra care and may schedule more frequent sessions every 2 to 3 weeks until the nails are brought back to a healthy length. Cost varies depending on where you live but expect professional nail trims to range from $10 to $25 per session. Some groomers include nail care in full grooming packages, which can offer better value if multiple services are needed.
Regular trims maintain paw health and comfort. Nails that grow too long can cause dogs to develop cracks, tears, or infections. The decision rule of trimming nails before they touch the ground or cause discomfort prevents these issues. The best outcome is a consistent nail length that allows the dog to move easily without pain, with nails shaped neatly and safely trimmed back from the quick to avoid bleeding.
Preparing Your Dog for a Professional Nail Trim
Preparing your dog for a professional nail trim eases the process and lowers stress for both your pet and the groomer. Regular handling and gentle introduction to trimming tools, combined with positive reinforcement, can make nail trims a routine and calm experience. Owners can help by building these habits ahead of the appointment and scheduling trims at the right time.
Introducing Tools and Handling Paws Gently
Start by getting your dog comfortable with paw handling well before the trim day. Gently touch and hold each paw for a few seconds at a time, gradually increasing the duration over days or weeks. This helps your dog get used to having its paws examined and reduces fear during the actual trimming.
Introduce the tools the groomer will use, such as clippers and nail files, at home. Let your dog sniff them while providing calm, soothing talk, which lowers anxiety and builds familiarity. For example, you can gently run a nail file along your dog’s nails to simulate the sensation.
- Handle paws daily for 2, 3 minutes
- Show clippers and files calmly without using them
- Gently press paws to spread toes and expose nails
- Use a soft voice and slow, deliberate movements
- Stop if your dog resists, then try again later
- Check that nails are visible and free from debris
- Avoid forcing paws or holding too tight
This routine makes nail trims less surprising and smoother because your dog learns the sensation is safe and temporary. If nails are curled into the foot or your dog shows pain, see your vet before the groomer’s visit.
Using Praise and Treats Progressively
Positive reinforcement is key to building good associations with nail trims. Offer a small treat or praise every time you touch your dog’s paws or present a grooming tool. Gradually increase the difficulty, start with just holding the paw, then touch the nails, then simulate clipping.
Use a simple script around your dog: “Good paw,” “Easy trim,” or “All done” paired with calm petting. This repeatable phrase helps your dog understand the process as friendly and predictable. Avoid loud noises or sudden movements, which may cause fear or resistance. A sample positive reinforcement session might look like:
- Say “Good paw” while gently holding a paw.
- Give a treat immediately after releasing the paw.
- Repeat for all paws over 5, 10 minutes.
- Introduce the clipper sound off to the side, reward calm behavior.
- Gradually bring clipper closer over several days with treats.
Building these associations over weeks can reduce anxiety during the actual groomer appointment, making trimming quicker and safer.
Scheduling Trims When Dogs Are Calm or Tired
Choosing the right time for a nail trim helps your dog stay relaxed and cooperative. Groomers often recommend scheduling trims after exercise or during quiet times when your dog is naturally less energetic. A tired dog is less likely to fuss or struggle during the process.
For example, plan the nail trim at least 20 minutes after a walk or play session. Avoid times when your dog is hungry, scared, or just waking up, as these factors can increase stress. Consult your groomer about your dog’s usual routine and temperament to pick the ideal appointment slot.
At home, use this timing for practice sessions too. Nail trimming attempts after a calm activity increase success and positive outcomes.
Handling Special Cases: Overgrown Nails, Dewclaws, and Puppies
When dealing with overgrown nails, groomers trim them gradually rather than all at once. Cutting a long nail too short can cause pain and bleeding since the nail’s quick, the sensitive area with blood vessels and nerves, extends further down in overgrown nails. Groomers often start by trimming just the tip to reduce length safely. They allow a few days to a week between sessions for the quick to recede naturally before trimming again. This staged approach avoids hurting the dog and prevents reluctance at future trims. For very long nails, they may use a nail grinder to smooth edges and avoid splitting. Using a dog-friendly nail grinder requires careful control to prevent heat buildup, which can burn the nail, so the tool is applied for short bursts (2, 3 seconds at a time) with breaks to cool the nail.
Dewclaws need special attention because they grow on the inner side of the leg and don’t touch the ground. Their quicks can be longer or more irregular, so groomers trim them carefully to avoid cutting too deeply. Because dewclaws are less worn down naturally, groomers assess the nail angle closely to find safe cutting points. These nails may also be removed surgically in some dogs, but when they’re present, regular grooming prevents painful snagging or infection. Groomers keep the dog’s paw steady and use sharp clippers to cut dewclaws slowly, usually trimming small amounts frequently to reduce the risk of injury.
Getting puppies used to nail trims is critical for long-term grooming success. Professional groomers use gentle handling combined with positive reinforcement like treats and praise. They introduce touching the paws without trimming on the first visits, letting the puppy relax in the environment. Then, groomers trim only the tips of the nails, gradually increasing the amount trimmed over several sessions. This slow, consistent exposure helps puppies associate nail trimming with calm and comfort rather than fear. Groomers often suggest owners practice nail handling at home, keeping sessions brief and reward-based, to build the puppy’s confidence.
Trim overgrown nails in small increments with breaks in between sessions to avoid hitting the quick and causing pain or bleeding.
Step-by-Step Action Plan for Trimming Your Dog’s Nails Safely
Follow these steps to trim your dog’s nails effectively, minimizing stress for both of you and keeping your dog’s paws healthy.
- Before You Start: Gather the right tools such as a sharp nail clipper designed for dogs, styptic powder to stop bleeding, and treats to reward your dog. Knowing you have proper tools helps keep your dog safe during trimming.
- Day 1: Acclimate your dog to having their paws handled by gently touching and praising them. Successful acclimation shows by relaxed behavior when paws are touched.
- Day 2: Introduce the nail clipper near your dog without clipping. Reward calm reactions. This builds positive association without pressure.
- Day 3: Trim a tiny bit off one nail, especially if your dog has light-colored nails where you can see the quick. Stop immediately if your dog resists or shows discomfort.
- After 1 Week: Gradually trim more nails, always checking the quick and stopping if you see any signs of bleeding or distress. A calm dog after trimming shows the method is working.
- After 2 Weeks: Maintain a regular schedule by trimming nails before they start to touch the ground. Regular trims prevent overgrowth and avoid painful breaks.
- Ongoing: Use treats and praise each session to keep your dog cooperative. If nails are dark-colored and the quick is hard to see, trim small amounts frequently rather than a lot at once.
Frequently Asked Questions
Can Dog Groomers Trim Nails Without Causing Discomfort?
Yes, groomers trim nails in small increments with breaks to keep dogs comfortable and calm throughout the process. They watch the dog’s reactions closely to avoid causing pain or stress.
What Methods Do Groomers Use to Check If Nails Are Trimmed Enough?
Groomers usually examine the nails visually and feel for the quick area, trimming slowly until nails reach a safe length. Regular breaks help reassess and prevent cutting too short.
How Do Groomers Manage Dogs That Have Never Had Nails Trimmed Before?
Groomers usually introduce nail trimming gradually, allowing the dog to get used to tools and touch while providing positive reinforcement to reduce fear. They may trim only a few nails at first.
Do Dog Groomers Trim Nails Differently on Different Breeds?
Yes, groomers adjust techniques based on breed nail thickness, color, and growth patterns, using the best tools and angles for each dog’s specific nail type. This helps avoid injury and provides a clean trim.
Can Groomers Remove Torn or Broken Nails During a Trim?
Groomers can safely trim torn or broken nails by cleaning and shaping the area to prevent infection, but severe damage may require a veterinarian’s care. Groomers handle minor nail injuries with care.
Why Do Professional Groomers Sometimes Use Nail Grinders Instead of Clippers?
Nail grinders smooth sharp edges after clipping and are gentler, reducing the risk of splitting or cracking nails. They also allow gradual shortening, which helps avoid hitting the quick in dark nails.
Before You Go
Trimming your dog’s nails safely requires the right tools, gentle handling, and patience. Start slow, practice regularly, and watch your dog’s reactions closely during each session. Your next step is to set up a comfortable spot with all your supplies ready for your first nail trimming session.





3 Comments