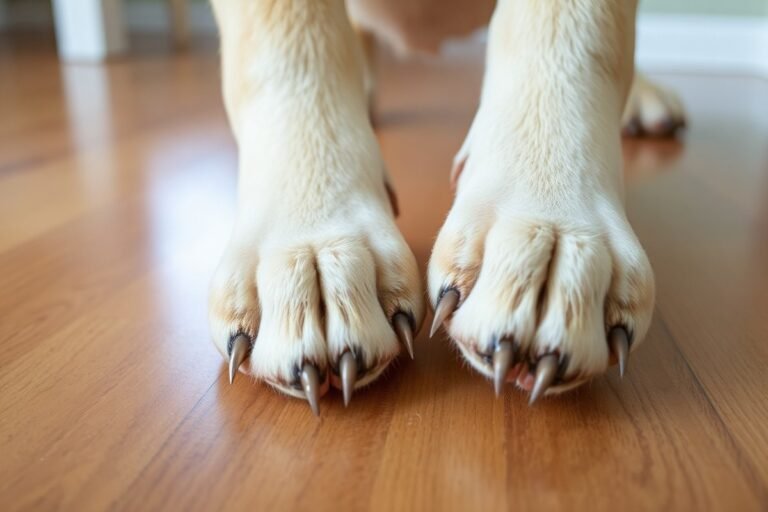
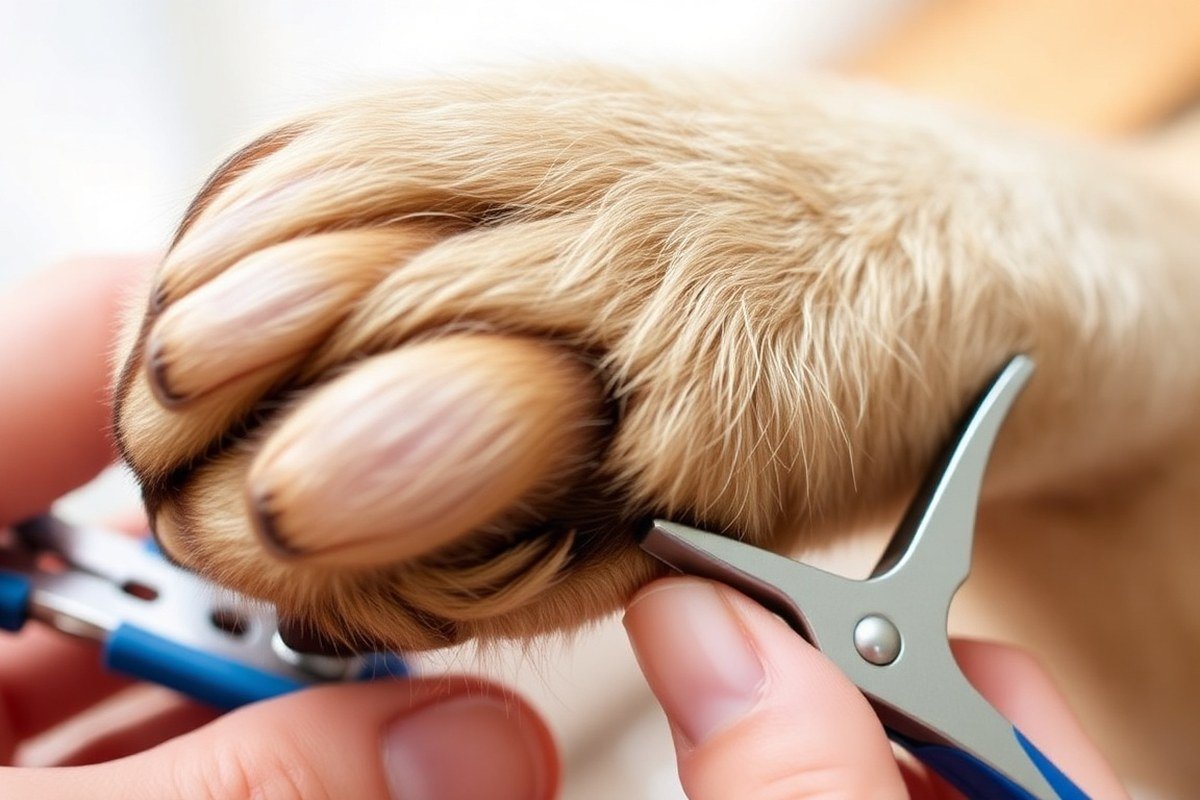
What Is a Dog Quick? Complete Guide with Safe Trimming Tips
The quick in a dog’s nail is the tender area inside that holds blood vessels and nerves. Knowing exactly what the quick is helps prevent causing pain or bleeding when trimming your dog’s nails. Being able to identify the quick allows you to clip nails safely and keep your dog pain-free and healthy.
This information is helpful if you’re a new dog owner or anyone wanting to trim your dog’s nails at home without causing injury. You’ll learn how to spot the quick on different nail types and get practical tips for safe trimming and care if the quick gets nicked.
Key Takeaways
- Trim dog nails every 1 to 2 weeks to encourage the quick to recede safely and slowly.
- Look for a dark circle or pulp in the center to identify the quick, especially on black nails.
- Use dog nail clippers to make small, 45-degree angled cuts to avoid reaching the quick.
- Cutting into the quick calls for calm action to stop bleeding, use styptic powder or cornstarch, which typically halts bleeding within 5 to 10 minutes.
- Frequent trims prevent nails from growing too long and help keep the quick healthy and short.
- The quick starts receding approximately 7 days after trimming, with noticeable changes around a month.
What Is the Dog Nail Quick and Why It Matters
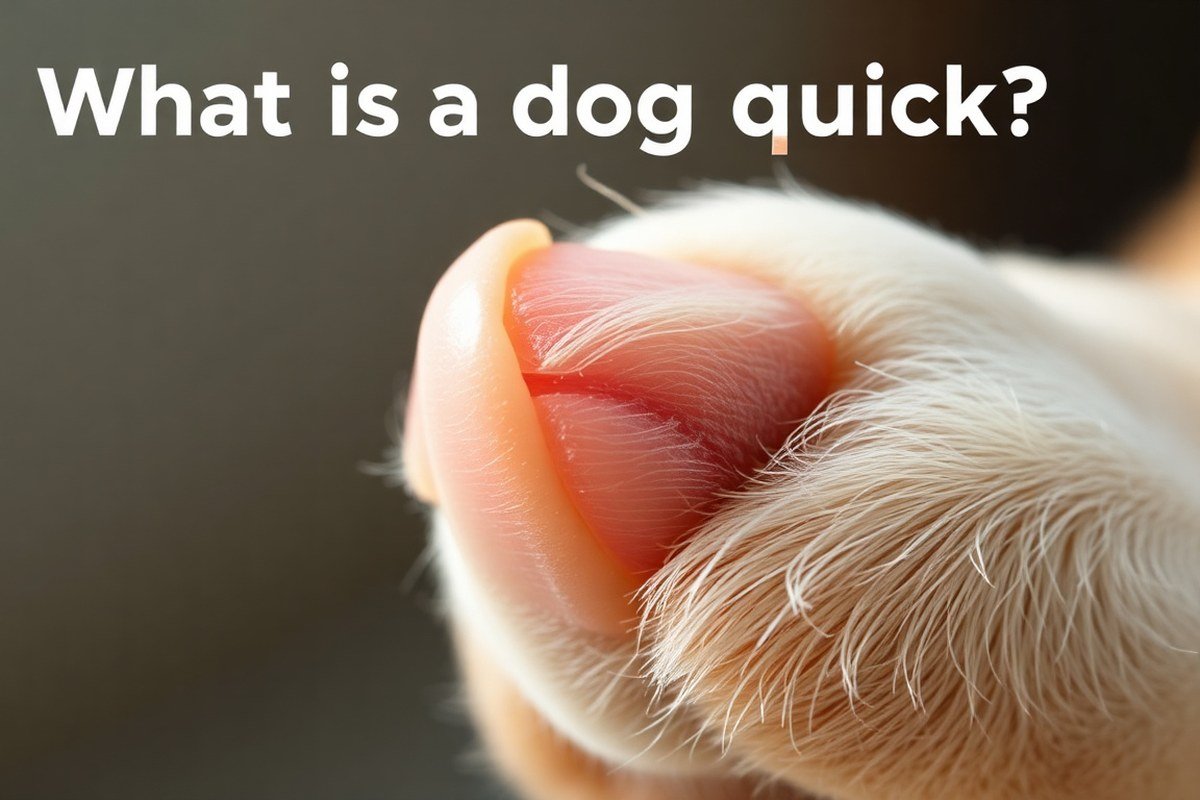
The dog nail quick is a sensitive, living part of your dog’s nail that runs inside the hard outer shell. It contains blood vessels and nerves, making it essential to avoid when trimming. The quick extends from the nail bed and grows outward along with the nail. Cutting into it causes pain and bleeding, which can frighten your dog and make future nail care challenging.
Anatomically, the dog’s nail consists of two main parts: the hard outer layer that you see and trim, and the soft tissue inside known as the quick. The quick looks like a small pink core in light-colored nails, but in dark-colored nails, it is harder to distinguish. The quick connects to the nail bed and supports nail growth. Over time, if nails are not trimmed, the quick grows longer with the nail, making safe trimming difficult without touching the quick.
Understanding the quick is important because trimming should target only the hard outer nail without cutting into the quick. To protect the quick during clipping, trim small amounts off the nail tip, especially if the nails are long. For nails that are overgrown, trim gradually and allow one to two weeks between trims to give the quick time to recede. Regular trims every two to four weeks help keep the quick from growing too long, reducing the risk of cutting it. Otherwise, the quick can extend further and increase the chance of injury with longer nails.
Avoiding the quick not only prevents pain and bleeding but also helps keep your dog comfortable with nail trimming sessions. Cutting the quick often causes your dog to resist future trims due to the discomfort. Knowing the nail anatomy and how the quick extends with the nail allows you to trim safely. When you do trim, target only the opaque, white or off-white nail tip, avoiding the pinkish or gray pulp which signals the quick.
The cost of a quick injury is more than just immediate bleeding; it can create ongoing nail sensitivity or infection if not treated quickly. Tools like clippers with quick sensors or grinders offer ways to safely trim without hitting the quick. However, always trim slowly and cautiously to maintain the quick’s health. For dogs with very dark nails or overgrown nails, it might take several sessions of careful trimming to encourage the quick to recede safely.
How to Identify the Quick on Light and Black Dog Nails
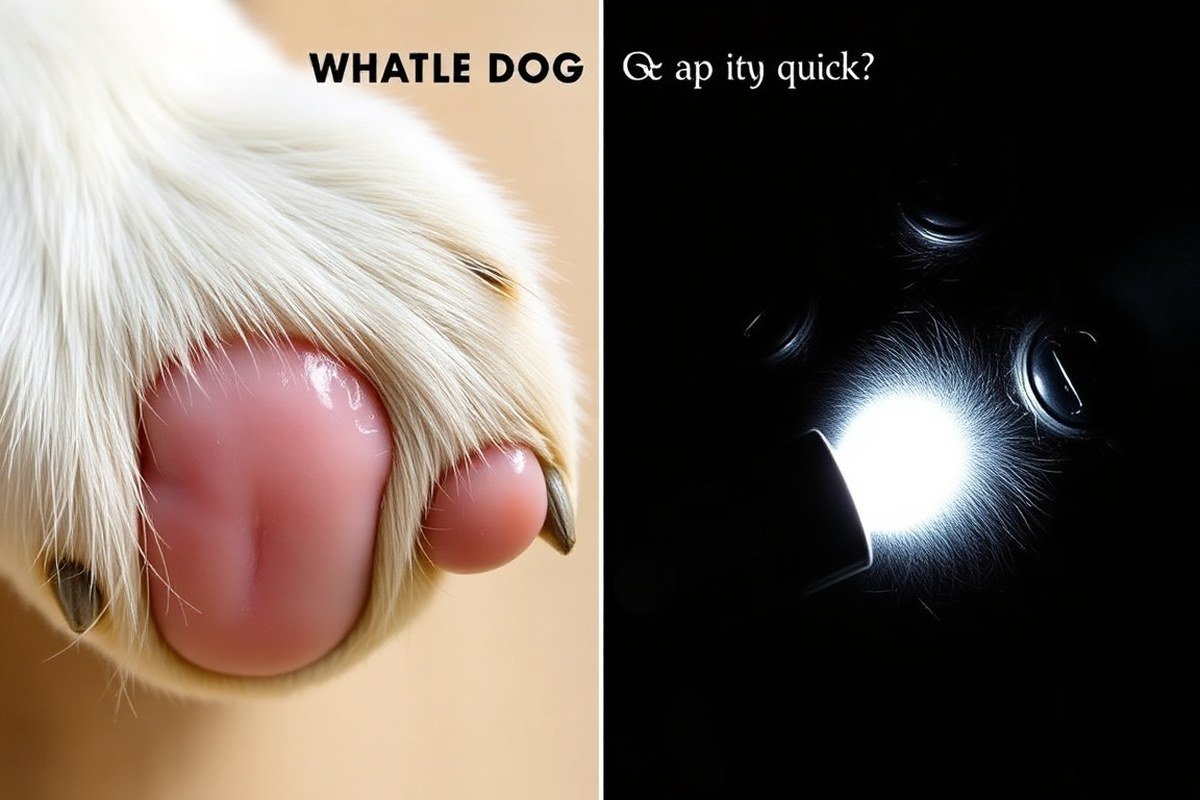
Finding the quick on your dog’s nails depends on the nail color. Light-colored nails display the quick as a visible pink strip, making it easier to avoid. For black nails, you need more careful observation and gradual trimming, sometimes using a flashlight to detect subtle clues.
Identifying the Quick on Light-Colored Nails
On light-colored nails, the quick appears as a pink or red stripe running through the center. It extends from the base toward the tip and contains blood vessels and nerves, so cutting into it causes pain and bleeding. You can spot this easily by holding your dog’s paw up to good natural light or a bright lamp.
Because the quick is visible, trim just beyond its end where the nail is white or clear. Avoid cutting into the pink area by stopping at the point where the nail turns opaque or white again. It’s important to trim regularly to keep the quick from extending too far.
Using Flashlight to Spot the Quick on Black Nails
Black nails hide the pink quick inside, making it invisible from above. A flashlight or smartphone light helps by shining through the nail to reveal a small triangular groove on the underside or a subtle dark circle within the nail. These clues show you when you are approaching the quick.
Trim the nail in tiny 1 to 2 millimeter increments at a 45-degree angle. Stop when you see a dark dot inside the freshly cut nail, that’s the quick. Pausing frequently to check reduces the risk of cutting too deeply.
- Hold your dog’s paw gently but firmly to keep it still.
- Shine a small flashlight under the nail to look for a groove or dark spot.
- Trim a small section of nail (1-2 mm) angled slightly away from the paw.
- Stop trimming and examine the cut edge.
- Repeat the light check and trim again if no dark spot appears.
- Use treats and calm praise to keep your dog relaxed through the process.
- Stop trimming when the dark spot or groove is visible, then pause to avoid hitting the quick.
Trim black nails slowly and in small steps to prevent cutting into the quick and causing pain or bleeding.
Tools to Help Find the Quick Safely
A bright flashlight or your smartphone’s flashlight can be a simple yet effective tool to locate the quick, especially on dark nails. Holding the nail up to a strong light source improve visibility of the blood vessel beneath the surface.
Special dog nail grinders also allow slow removal of nail material while shaping the nail without fully cutting into it at once. This helps you approach the quick carefully and stop trimming as soon as a pink hue or dark spot shows up. Avoid using scissors or human nail clippers that provide less control near the quick.
Having the right tools and taking your time protect your dog’s comfort and make nail care safer. Professional groomers and vet technicians recommend consistent checking and using light for greater precision in every trim.
Safe Nail Trimming Techniques to Avoid Cutting the Quick
Trimming your dog’s nails safely means clipping a small amount at a 45-degree angle before the quick to avoid pain and bleeding. Using the right tools and techniques helps keep nail trims comfortable and prevents injury to the sensitive quick inside the nail.
Choosing the Right Nail Clippers or Grinders
Select nail clippers designed specifically for dogs, which are usually scissor-style or guillotine-style and cost between $10 and $30. These provide control for quick trims. For thick or overgrown nails, use a rotary grinder or nail file to gradually smooth and shorten nails without pressure. Avoid human nail clippers, as they can crush dog nails and increase injury risk.
Rotary grinders gently grind the nail down and can help avoid cutting the quick by removing small amounts at a time. They typically cost $20 to $50. Both tools should be clean and sharp to prevent splintering and discomfort.
Trimming Nails in Small, 45-degree Angled Clips
To safely trim your dog’s nails, cut small pieces angled at 45 degrees away from the paw. This angle follows the natural nail shape and reduces the risk of clipping into the quick. Start with only a few millimeters per clip, especially if unsure where the quick ends. For dark nails, where the quick is not visible, trim little by little with frequent checks.
- Hold the paw firmly but gently to keep the dog still.
- Position the clipper at a 45-degree angle to the nail tip.
- Trim a small portion of the nail tip, less than 2 to 3 mm at a time.
- Stop if the nail feels soft or you see a change in nail color, indicating approaching the quick.
- If unsure, switch to a rotary grinder to file down the nail slowly.
- Check the nail after each cut and praise the dog to keep it calm.
- Repeat on all nails, avoiding the skin surrounding the nail to prevent cuts.
Preparing and Handling Your Dog During Trims
Prepare your dog by introducing nail clippers gradually to reduce anxiety. Let your dog sniff the tool and reward calm behavior with treats. Position your dog comfortably on a non-slip surface or in your lap for small breeds, supporting the paw steadily.
Hold the paw gently but firmly to prevent sudden movements. Speak calmly and offer breaks if your dog shows signs of discomfort. Frequent, short sessions work better than trying to trim all nails at once. Keep styptic powder or cornstarch nearby as a precaution for accidental quick cuts.
What to Do If You Cut the Quick: Immediate Care
Cutting the quick is painful for your dog and causes bleeding that usually stops within 5 to 10 minutes with proper care. Treat the nail promptly using pressure and a clotting agent like styptic powder or cornstarch. Comfort your dog after the incident to reduce stress.
Stopping the Bleeding Quickly
Recognize a quick injury by checking for visible bleeding and signs your dog is in pain, such as licking the nail or limping. The amount of blood depends on how far down the quick is cut, since it contains blood vessels and nerves.
Apply firm pressure to the nail to slow down the bleeding immediately. Use a clean cloth or gauze to gently press the tip of the nail for several minutes if the bleeding is heavy. Staying calm helps your dog remain calm during the process.
Using Styptic Powder or Cornstarch Effectively
Styptic powder helps blood clot fast, making it more effective at stopping nail bleeding than cornstarch. Cornstarch can be a temporary fix when styptic powder isn’t available. Follow these steps to treat the bleeding nail:
- Hold your dog’s paw securely but gently to prevent sudden movements.
- Dab styptic powder or cornstarch onto the bleeding tip of the nail.
- Apply firm pressure for several seconds to a minute until bleeding stops.
- Wipe away any excess powder carefully without removing the clot that forms.
- Repeat powder application and pressure if bleeding continues, but limit total time to 10 minutes.
- Reward your dog with a treat to create a positive association.
Powder or gel products like Qwik Stop are widely available for a few dollars at pet stores or online. Having them on hand keeps you ready for nail trimming accidents.
When to Contact a Veterinarian
Seek veterinary care if the bleeding does not stop after 10 minutes of applying pressure and styptic powder. Persistent bleeding could indicate a deeper injury or infection risk that requires professional treatment.
Also contact a vet if your dog shows signs of severe pain, swelling, or if the nail appears broken or severely damaged. The vet may apply antibiotic ointments or bandage the paw to protect the exposed nail quick and prevent contamination.
Even if bleeding stops quickly, monitor your dog over the next day. Excessive licking, limping, or signs of infection warrant a vet visit. Prompt attention ensures proper healing and comfort for your pet.
How Often Should You Trim to Keep the Quick Healthy?
Trim your dog’s nails about every 3 to 4 weeks to keep the quick healthy and short. Regular trimming encourages the quick to recede, which helps avoid discomfort and makes each nail cut safer. When nails are left too long, the quick grows out alongside the nail, increasing the risk of pain and bleeding if trimmed abruptly.
The quick is not fixed in length; it moves closer to the nail tip when you let nails grow unchecked. By trimming frequently, you help the quick stay back closer to the nail base. It’s a gradual process, so you’ll need ongoing care to maintain the ideal nail length. Watch for changes in the quick’s position and adjust trimming intervals if it doesn’t seem to shorten over time.
Exercise plays a role in keeping nails and the quick healthy but may not be enough on its own. Walking your dog on hard surfaces like sidewalks helps naturally wear down nails, which may slow quick growth. However, many dogs still require regular trimming at home or by a professional to avoid overly long nails and quick extension.
Different breeds and activity levels affect how fast the quick grows. Small breeds often need trims every 3 to 4 weeks because their nails grow quickly. Larger dogs with slower nail growth might manage every 6 to 7 weeks between trims. Pay attention to your dog’s habits and nail condition to find the right schedule. Consistency is key to maintaining healthy nails and avoiding painful quick injuries.
Trim nails cautiously and frequently to help the quick recede, reducing the risk of cutting into it and causing bleeding or pain.
How Long Does the Quick Take to Recede After Trimming?
The quick in a dog’s nail recedes gradually with regular trimming, typically starting to shorten within about a month of consistent care. This process depends largely on trimming the nails every one to two weeks. Frequent trimming slowly encourages the nail to grow shorter while the quick retreats, making future nail care easier and less uncomfortable for your dog.
Different dogs show varying rates of nail quick retreat based on factors like breed, age, level of activity, and nail condition. Dogs that often walk on rough or hard surfaces tend to wear down their nails naturally, so their quick shortens faster. On the other hand, less active dogs or those with thick nails may experience slower quick shortening, even with regular trimming.
Owners often wonder if there is a way to speed up the quick’s recession. The key is patience and steady maintenance rather than trying aggressive trimming. Cutting the nail too short risks hitting the quick, which is painful and causes bleeding. Avoid forcing rapid shortening by trimming only small amounts (about 1-2 millimeters) at a time. This gradual method encourages the quick to recede safely without damage.
The average timeline to see noticeable results is roughly four weeks, but some dogs may take longer due to their individual nail growth rate. During this period, trimming once weekly is usually effective. Keep your nail trimming tools ready, and if uncertain, ask your vet or groomer for a demonstration on identifying a safe trim length.
Remember, the quick is living tissue containing nerves and blood vessels. Quick recession happens as the nail grows out but the quick does not shrink on its own. Regular trimming trains the quick to withdraw to a shorter length over time. Skipping trims lets the nail and quick grow longer together, increasing the risk that trimming will pain your dog or cause bleeding.
Occasionally, trimming the nails too short can cause a quick injury. While infection is uncommon, immediate care is important to stop bleeding and soothe discomfort. Consult a vet if you notice persistent pain or signs of infection.
Trimming your dog’s nails regularly and with care helps keep the nails at a proper length and controls the quick’s size. This process requires patience and attention to how your dog reacts, but performing nail trims every week or two allows the quick to shorten gradually and safely over time.
Common Mistakes That Cause Quick Injuries and How to Fix Them
One common mistake is rushing the nail trim session without taking time to calm your dog. A nervous dog is more likely to squirm or pull away, which increases the chance of accidentally cutting the quick. It’s important to create a calm environment and use gentle handling to make your dog more comfortable.
Another frequent error is trimming too much nail at once, especially if the dog’s nails are very long. Cutting nails too short can expose or injure the quick, causing pain and bleeding. Gradual trimming in small amounts is safer and allows you to avoid cutting into the sensitive quick area.
Not using the right tools also contributes to quick injuries. Dull or inappropriate clippers require more force and can cause uneven cuts or slip, increasing the risk of damage. Using sharp, dog-specific nail clippers or grinders helps make clean cuts while minimizing quick injuries.
- Start trimming sessions with brief, positive interactions to build trust.
- Use treats and praise to reward calm behavior during nail trims.
- Trim only a small amount, about 1 to 2 millimeters, at a time to avoid the quick.
- Hold your dog’s paw gently but firmly to keep it steady without causing stress.
- Use bright light to see the quick clearly, especially on light-colored nails.
- Stop trimming if your dog shows strong resistance; try again later after calming.
- Consider working with a professional groomer or trainer if fear persists.
Handling a dog that resists nail trimming requires patience and gradual desensitization. Begin by touching and handling your dog’s paws regularly without trimming, pairing this activity with treats and calm talk. After a few days, introduce the clippers near the paw without cutting. Repeat these steps, slowly increasing contact until your dog accepts trimming calmly.
Introducing nail trimming as a regular, gentle routine helps your dog associate the process with positive experiences. Maintain short sessions of about five minutes to prevent anxiety, and avoid forcing your dog if they become distressed. Instead, pause and try again later to keep the experience manageable and reduce the risk of quick injuries.
Comparison of Nail Trimming Tools: Clippers vs Grinders for Quick Safety
Choosing the right tool for trimming your dog’s nails affects your ability to avoid cutting the quick. Clippers and grinders each have pros and cons when it comes to safety and control. Clippers are the traditional choice, allowing for quick, clean cuts. Grinders work by smoothing down the nail gradually, which lowers the risk of hitting the quick quickly but requires more time and patience.
For light-colored nails, clippers let you see the pink quick clearly, making it safer to trim right up to it. Dark nails hide the quick, so grinders can be safer because you remove nail material little by little, reducing the chance of accidentally cutting too far. Overgrown nails need gradual trimming regardless of tool to avoid quick injuries. Dewclaws require extra caution since their position and growth may differ.
| Nail Type | Safety Margin |
|---|---|
| Light | Stop at pink |
| Dark | Stop at black dot |
| Overgrown | Trim gradually |
| Dewclaw | Extra caution |
| Any nail | When unsure, stop |
Using a clipper, hold your dog’s paw firmly, position the blade perpendicular to the nail, and slice in one smooth motion. For grinders, turn the tool on before touching the nail, and apply gentle pressure, letting the grinder wear down the nail gradually. Clippers usually cost between $10 and $30, while electric grinders can range from $20 to $50 or more.
Grinders often cause less bleeding because they gradually reduce nail length, which is useful for dogs sensitive to clipping noises or motions. However, grinders take longer per nail and require more patience from both you and your dog. Clippers are quicker and can be safer on light nails where the quick is visible. For black nails, start slow with grinders or clippers, trimming just a tiny bit at a time and checking the nail frequently.
Always trim small amounts and pause frequently to check your dog’s nail; this helps you stop before reaching the quick and causing pain or bleeding.
Step-by-Step Action Plan for Safe Dog Nail Care
Start today by getting comfortable with your dog’s nails and spotting the quick. Follow these steps to protect your dog from pain and injury while keeping nails neat.
- Before Your First Trim: Examine your dog’s nails in a well-lit area to spot the quick on light nails or note where it likely is on dark nails. This helps avoid accidental cuts.
- Day 1: Choose the right tool based on your dog’s comfort and your skill, clippers for quick trims or a grinder for gradual shaping.
- Week 1: Trim a small amount off the nail tip or grind slowly, watching for a darker spot or a softer feeling that signals proximity to the quick.
- Week 2: Check nail length and the quick’s position again, adjusting how much you trim to avoid cutting too close.
- After a Trim: Praise your dog and check for any signs of bleeding or discomfort to ensure the quick wasn’t harmed.
- Monthly: Maintain a regular schedule by trimming or grinding before nails grow too long, which helps keep the quick recessed.
- After an Accident: If you cut the quick, apply styptic powder or cornstarch immediately and monitor your dog’s paw for healing progress.
Frequently Asked Questions
What Is the Purpose of a Dog’s Quick?
The quick supplies blood to the nail, making it sensitive and important to nail health. Avoiding it during trimming prevents pain and bleeding.
How Does the Quick Change as a Dog Ages?
The quick grows longer if nails aren’t trimmed regularly, especially in older dogs who may be less active. Regular trims help manage its length.
Can the Quick Grow Back Once It’s Trimmed Shorter?
Yes, the quick will slowly recede and shorten over time with regular nail trimming, allowing for safer nail maintenance.
Are Certain Dog Breeds More Prone to Quick Injuries?
Breeds with darker nails or thick nails may be harder to trim safely, increasing the risk of cutting the quick. Extra care is needed.
How Do Indoor vs. Outdoor Lifestyles Affect the Quick?
Dogs that walk mainly on hard surfaces often naturally wear down nails and the quick, reducing trimming needs compared to indoor dogs.
Can Health Problems Affect the Quick’s Growth?
Some health issues can cause slower nail or quick growth. If nails become brittle or unusually long, consult your vet for guidance.
The Bottom Line
Knowing what the dog quick is and how to avoid it can prevent pain and keep your dog comfortable. Try locating the quick on your pet’s nails today and choose the right tool for gentle trimming. This simple action will build your confidence and keep your dog’s paws healthy.