How to Make a Dog Bath Easier: 8 Practical Tips for Stress-Free Baths
To make a dog bath easier, start by creating a calm and safe environment and gather all essential supplies ahead of time. Using soothing tones and gentle handling helps reduce your dog’s anxiety, while proper preparation minimizes stress for both of you. Simple steps and the right tools can turn bath time from a challenge into a manageable routine.
This advice is perfect for dog owners seeking ways to make bathing less stressful for their pets and themselves. You’ll learn practical tips that cover everything from preparing your dog and selecting the right water temperature to protecting sensitive areas and managing difficult bath times.
Key Takeaways
- Begin introducing your dog to baths as early as eight weeks to build positive associations with water.
- Prepare the bathing area with all supplies within reach to keep the process smooth and timely.
- Use lukewarm water and control flow carefully to keep your dog comfortable and reduce squirms.
- Brush and detangle your dog’s coat before and after bathing to prevent mats and skin irritation.
- Protect your dog’s ears and eyes by avoiding direct water spray and using damp cloths for their faces.
- Rinse thoroughly, especially if using medicated shampoo that needs time to soak for effectiveness.
1. Create a Calm Environment to Ease Dog Bath Anxiety

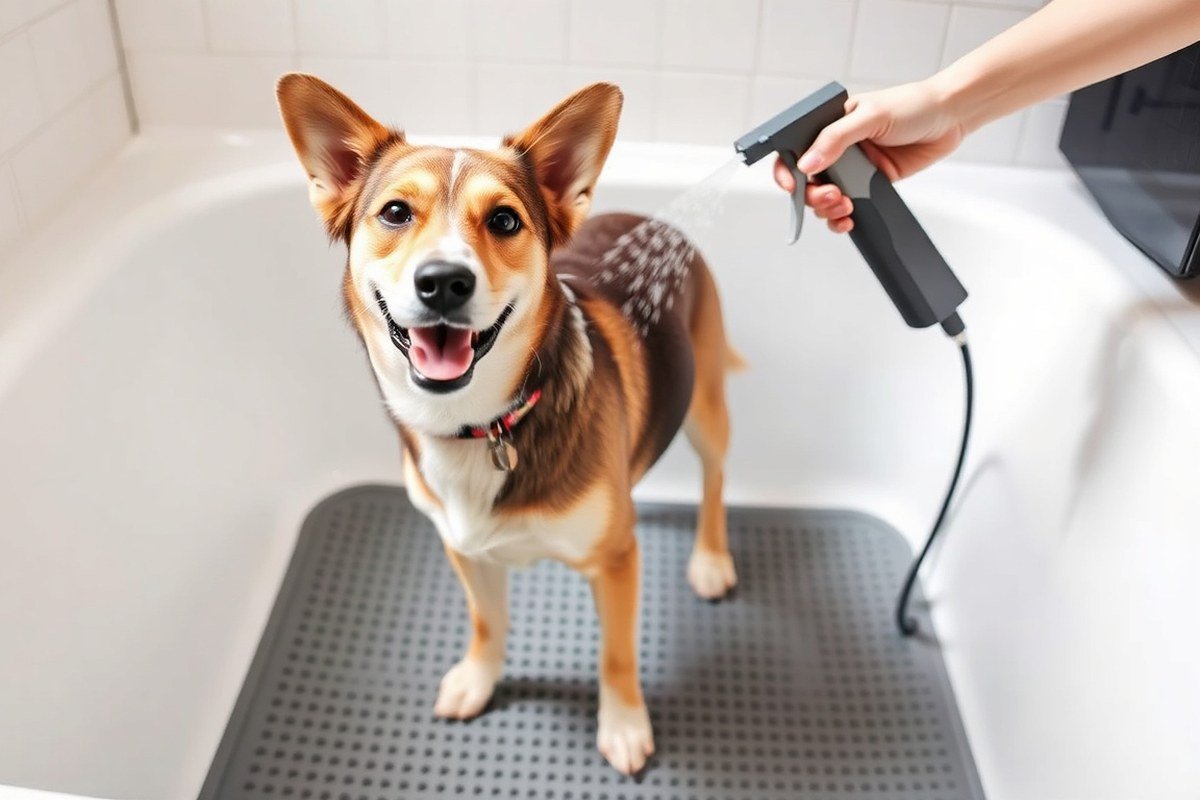
To make bath time calmer for your dog, start by preparing the environment and your mindset before bringing your dog to the tub. A safe, non-slip footing such as a rubber mat will help your dog feel secure standing without slipping. This simple step reduces stress by preventing unexpected slides that scare many dogs. Lukewarm water around 90°F is more comfortable and less shocking than cold or hot water. Keep the shower or faucet flow gentle and consistent to avoid startling your dog with sudden sprays.
Begin by wetting only one paw to let your dog adjust gradually to the sensation of water. This slow introduction lowers bath anxiety compared to immediately soaking the whole body. Use gentle fingertip pressure while massaging shampoo instead of harsh scrubbing, which can irritate skin and trigger discomfort or flinching. Keep the bath short, about 5 to 10 minutes, to prevent overwhelming your dog. Take breaks if your dog shows signs of being overwhelmed, like heavy panting, trembling, or trying to escape.
Watch your dog’s body language to gauge comfort. Signs of calm include relaxed ears, steady eyes, slow tail wags, and sitting or standing still. Stress signs include tucked tail, pinned ears, excessive yawning, lip licking, and avoidance. Reward calm behavior promptly with tiny treats such as small pieces of kibble or soft snacks during moments your dog stays still or cooperates. This teaches your dog to associate bath time with positive outcomes, making future baths easier.
Prevent a rushed setup by gathering all supplies, shampoo, towels, treats, and a brush, within reach before starting. Having everything ready helps maintain steady, predictable movements during the bath, which your dog can trust. Avoid grabbing or frequently repositioning your dog abruptly as that increases anxiety. Start bath training early, ideally from 8 to 10 weeks old, so your dog builds positive associations over time. If repeated calm setups don’t reduce stress, consider consulting a professional trainer for anxiety-focused help.
Using a calm voice and slow movements sets the mood for a less stressful experience. Before even turning on the water, take time to engage your dog with praise and a gentle pat. Bath time becomes less of a battle and more manageable when you keep the experience as predictable and calm as possible. Over many bath sessions, gradually increase how long your dog stays in the water, reinforcing calm moments with treats and praise. This training and environmental preparation costs little beyond some time and patience but makes bath day smoother and safer for both of you.
2. Gather Essential Supplies for an Efficient Dog Bath

Gathering the right supplies before you start bathing your dog can make the process smoother and less stressful for both you and your pet. Having everything on hand avoids interruptions and lets you focus on your dog’s comfort throughout the bath. The key items include dog-specific shampoo, brushes, a non-slip mat, towels, and easy-to-use rinsing tools.
Must-Have Tools and Their Uses
Using the proper tools helps speed up the bath and reduces stress. A brush or comb removes loose hair and detangles mats before water tightens them, which prevents painful pulling. A cup or a handheld sprayer makes it easier to wet and rinse the coat evenly without splashing your dog’s face. Towels absorb water quickly and keep your dog warm after the bath.
- Dog-specific shampoo to avoid harsh ingredients found in human products
- Brush or comb to remove loose hair and mats before bathing
- Non-slip mat to prevent slipping and panic
- Towels (two or three) to dry and keep your dog warm
- Cup or handheld sprayer for controlled wetting and rinsing
- Silicone drain protector to catch hair and prevent pipe clogs
Having these tools ready helps maintain control and comfort, making the bath more efficient and less stressful for your dog.
Choosing the Right Shampoo for Your Dog
Select a shampoo made specifically for dogs, as their skin has a different pH than humans. Fragrance-free formulas are best if your dog has sensitive skin. For dogs with allergies or skin conditions, a medicated shampoo prescribed by your veterinarian is the safest choice. These shampoos often need to stay on the coat for 10 to 15 minutes before rinsing to be effective.
Consider your dog’s coat type when selecting shampoo: some formulas condition the coat to keep it moisturized, which is helpful if your dog gets frequent baths or swims often. Lavender and chamomile ingredients can help calm anxious dogs during the bath.
Always follow the instructions on medicated shampoos, including soaking time, to ensure effectiveness and avoid irritation.
Safety Gear for Bathing (Mats, Towels, Toggles)
A non-slip mat in the tub or sink is essential to prevent your dog from slipping. This safety measure reduces panic and injury, encouraging your dog to stand calmly. Position the mat before bringing your dog into the bathing area so they feel stable from the start.
Keep two or three absorbent towels close by, one to dry the neck and head after rinsing, another for the body, and a third to wrap your dog once the bath is finished. Using towels quickly reduces your dog’s chill and helps prevent skin infections from retained moisture. You can also use a grooming tether or bathing harness for dogs that struggle with standing still. These tools gently secure your dog, making the process safer and easier.
3. Prepare Your Dog Step-by-Step for a Stress-Free Bath
Preparing your dog well before bath time can make the whole process less stressful and more efficient. Exercise helps burn off excess energy so your dog is calmer during the bath. Brushing before the bath removes loose hair and tangles, making shampooing easier and preventing knots from worsening when wet. For dogs scared of baths, gradual acclimation helps them associate the experience with calm and positive rewards. Follow these steps to set the stage for a smooth bath:
- Exercise your dog for 15 to 30 minutes. A brisk walk or playful fetch session works well. This helps your dog release pent-up energy and reduces nervousness during the bath.
- Choose a quiet place with minimal distractions. This keeps your dog focused and calm as you start the preparations.
- Brush your dog gently but thoroughly. Use a suitable brush for your dog’s coat type. Removing loose hair, dirt, and knots prevents discomfort and allows water and shampoo to reach the skin evenly. Pay extra attention to areas prone to mats like behind the ears and under the legs.
- Introduce water-related cues gradually for scared dogs. You can start by bringing your dog near the bath or sink without water running. Speak calmly and offer small treats. Repeat this over several sessions to build positive association.
- Use a script for gradual introduction: Say to your dog, “Bath time is coming, plenty of treats!” while moving to the bathing area. Let your dog sniff and explore the space. Reward calm behavior with a treat. Place your dog’s paws in a shallow tub of lukewarm water without running it. Offer calm praise and treats, then stop for the day before starting the actual bath.
- Prepare treats and supplies in advance. High-value treats like small pieces of cooked chicken or commercial dog treats work best to reward cooperation throughout the bath.
- Keep initial baths short for fearful dogs. A quick rinse and minimal fuss help your dog adapt faster. Gradually increase bath time as your dog becomes more comfortable.
A well-prepared dog tends to stay calmer during the bath, making washing more thorough and the whole experience smoother. Skipping exercise or brushing often leads to restlessness and mats tightening when wet, which can cause discomfort and extend grooming time. Gradual exposure paired with positive reinforcement reduces bath-time anxiety and helps your dog look forward to it rather than resist.
4. Choose and Control Water Temperature and Flow for Comfort
Use lukewarm water between 85°F and 95°F to keep your dog comfortable during bath time. Water that’s too hot can irritate your dog’s skin, while cold water might cause them to shiver or panic. Test the temperature on your wrist before starting. Adjusting the water temperature to this range helps your dog feel safe and calm.
Control the water flow to avoid startling your dog by using a gentle, steady stream rather than a harsh spray. A handheld sprayer or a bucket to pour water slowly works well. Begin wetting your dog’s back first instead of the face to prevent water from hitting sensitive areas. For example, if you use a bucket or pitcher, pour water carefully on the body and avoid splashing near the head.
Breed and coat type influence how you use water during baths. Dogs with oily coats, like Basset Hounds, benefit from weekly baths because oil traps dirt. Bathing these breeds with lukewarm water and a gentle flow prevents residue buildup without stripping essential oils. On the other hand, breeds such as Golden Retrievers have water-repellent coats and only need baths every 6 to 8 weeks. These dogs may prefer a slower wetting process and minimal water exposure to maintain coat health.
For dogs with thick or long fur, premixing shampoo with water in a small cup before applying can make rinsing easier and reduce the time the shampoo sits on their skin, helping prevent irritation. Keep bath sessions short to prevent your dog from becoming overwhelmed or stressed, which can lead to negative bath experiences.
Avoid sudden changes in water flow rate or temperature mid-bath, as these can shock your dog and increase their anxiety. Smooth, steady water application helps them associate bath time with comfort rather than fear. Your dog may react nervously, so pause to use soothing tones or gentle pets before you keep going.
Skipping the direct spray over the head is important. Water in the ears and eyes can cause discomfort or infections. Use a damp washcloth to clean the face gently. Safety and comfort reduce resistance and make your dog more cooperative over time.
Regular bathing intervals usually range from every 4 to 12 weeks depending on coat, lifestyle, and health status, following veterinarian advice ensures you don’t overbathe, which leads to skin irritation and increased scratching. Watch out for signs like severe itching, open sores, or panic during baths, and talk to your veterinarian instead of forcing a bath at home.
5. Brush and Detangle Properly Before and After Bathing
Brushing your dog both before and after the bath helps prevent mats, makes shampoo more effective, and speeds up drying without causing stress. Start with brushing before wetting your dog’s coat. This removes loose fur, tangles, and mats that tend to tighten when wet. Use a brush suited to your dog’s coat type, for example, slicker brushes work well for long-haired breeds, while bristle brushes suit short-haired dogs. This step costs nothing but time and takes about 5 to 10 minutes depending on your dog’s size and coat condition. Skipping this can trap moisture in mats, which may lead to skin irritation or hotspots.
When brushing before the bath, separate the fur in sections and work gently to avoid pulling skin. For mats too tight to brush out, consider applying a detangling spray or conditioner first. This softens the fur and reduces tugging. Avoid brushing a wet coat before applying shampoo, as it can cause discomfort and damage the hair.
After shampooing and rinsing, brushing your dog again is essential to remove any new tangles created by bathing. Use a leave-in spray conditioner for dogs with longer coats to ease this step. Pat your dog lightly with a towel then begin brushing every 10 to 15 minutes during air drying. This prevents new mats by separating the fur and speeding drying. Using a grooming tool designed for your dog’s hair, such as a comb with wide-set teeth for thick coats or a deshedding tool for dogs with heavy undercoats, improves results. Brushing during drying should feel gentle and calming to your dog to avoid stress.
Different coat types require different techniques. For curly or woolly coats, a comb with rotating teeth works better to reach the base without causing breakage. Dogs with double coats benefit from an undercoat rake before bathing to clear loose hair. Short-haired dogs with minimal tangling need only a basic bristle brush before and after the bath. Understanding your dog’s coat type will save time and discomfort.
Brushing wet mats can hurt your dog and worsen tangles; always brush thoroughly before the bath and gently during drying to keep mats from forming.
Proper brushing makes shampoo and conditioner spread evenly and lets the skin breathe, promoting a cleaner bath and healthier coat. It also cuts drying time by breaking up clumps of wet hair, reducing your dog’s chill and stress. Using bath mats or towels to prevent slipping during brushing and drying adds safety for both of you. This grooming routine usually takes about 15 to 20 minutes extra but pays off by making baths smoother and more enjoyable long term.
6. Protect Sensitive Areas: Ears, Eyes, and Face Cleaning Tips
Keeping your dog’s ears, eyes, and face safe during bath time requires extra caution to avoid water or shampoo entering delicate areas. Water inside the ears can lead to infections, and soap or water in the eyes often causes irritation and discomfort. Directly spraying or pouring water over the head increases the risk of these problems. Instead, gently cleaning the face with a warm, damp cloth provides control and prevents unwanted water contact.
Before you start, place cotton balls gently in your dog’s ears. This simple step blocks water from getting inside and can reduce the chance of ear infections. Adding a few drops of mineral oil around the eyes (only if recommended by your vet) may also protect from irritation. Use dog-safe wipes for areas around the eyes and ears if your dog dislikes cloth wiping or for quick clean-ups.
- Insert cotton balls in your dog’s ears. Use clean, dry cotton balls snugly placed at the ear canal entrance. Do not push them inside deeply. This creates a barrier so water can’t enter during washing.
- Dip a soft washcloth in warm, soapy water. Use a mild dog shampoo diluted with water to keep soap gentle. The water temperature should be around 90°F to 100°F, matching your dog’s body temperature to avoid discomfort.
- Wring out excess water from the cloth. A nearly dry cloth is best to control how much moisture touches your dog’s face.
- Wipe your dog’s face gently. Use small, careful strokes on the forehead, cheeks, and chin. Avoid the eyes, nose, and open mouth to prevent soap and water contact.
- Rinse the cloth in clean warm water. Use the clean cloth to gently remove all soap from your dog’s face, repeating the gentle wiping motion.
- Remove the cotton balls from the ears carefully. After completing the wash, take out the cotton balls and dry around the ears with a clean, dry towel. Use an ear cleansing solution recommended by your vet to clean inside the ears and help prevent infection.
- Dry your dog’s face thoroughly. Pat the face with a soft dry towel to remove any remaining moisture without rubbing, which may cause irritation.
This approach avoids spraying or pouring water directly on the face, minimizing stress and the risk of infection. Cleaning this way generally takes 5 to 10 minutes and costs only a few dollars for cotton balls and dog shampoo. Avoid rinsing your dog’s face with a hose or showerhead as sudden water pressure or temperature changes can startle your dog and encourage resistance to future baths.
7. Rinse Thoroughly and Dry Efficiently to Prevent Skin Issues
Rinsing your dog thoroughly and drying properly after a bath are essential to avoid skin irritation, mats, and discomfort. Complete shampoo removal protects your dog’s skin pH balance, while effective drying prevents chills and tangled fur. Use slow, gentle rinsing followed by layered towel drying and careful brushing, finishing with a cool air dryer if needed.
Slow, Complete Rinsing Techniques
Rinsing usually takes longer than shampooing, especially with thick or double-coated dogs, it can range from 5 to 10 minutes depending on coat density. To rinse thoroughly without stressing your dog, use lukewarm water and aim gentle streams over the entire body while avoiding a strong direct spray on the face. Residual shampoo can cause itching and irritation, so take time to flush every spot, including under the belly, behind ears, and between toes.
A slow, systematic approach reduces your dog’s urge to shake off water prematurely, which can make drying harder. Use just enough water pressure to move shampoo residues but keep a hand on your dog to minimize sudden movements. Avoid soaking your dog more than necessary; heavy wetting risks chilling, especially in cool areas or with sensitive dogs.
- Start rinsing at the neck, moving water steadily down the body.
- Gently lift legs and rinse underneath to reach hidden spots.
- Flush paws thoroughly to remove shampoo from pads and between toes.
- Use a cup to rinse the face carefully, avoiding eyes and inside ears.
- Rinse multiple times until the water runs clear and no lather remains.
- Allow water to drain fully from the coat before stepping out of the tub.
Towel Drying: How Many and When
Towel drying should begin immediately after rinsing to reduce dripping and speed drying. Use at least two absorbent towels, one to blot excess water and another to wrap your dog. Press towels gently against the fur instead of rubbing vigorously to avoid tangling or irritating the skin.
Begin by wrapping one towel around the body to absorb large amounts of water. Towels designed for pets or microfiber options often work better than standard bath towels due to increased absorbency and lighter weight. Depending on your dog’s size and coat type, towel drying can take 5 to 10 minutes. Add extra towels if the first becomes saturated too quickly.
Brushing While Air-Drying or Using a Dryer
Brushing your dog during drying helps prevent mats and distributes natural oils evenly. Brush lightly with a slicker or pin brush starting at the legs and working toward the back, paying attention to thick or long fur areas. This is most important if you air-dry; brushing loosens tangles before they set as fur dries.
Using a dog-specific blow dryer speeds drying and reduces mats in dense coats. Set it on a cool or low heat setting to prevent hot spots and discomfort. Keep the dryer moving continuously over the fur, focusing on skin folds, paws, and behind ears, where moisture gathers. A dryer usually requires 10 to 20 minutes depending on coat length and thickness. Avoid human hair dryers because they often get too hot and can damage your dog’s skin.
Signs Your Dog Is Dry Enough
Your dog’s coat should feel dry to the touch without any damp or cool spots, especially near the skin and thick patches. A completely dry dog shows no lingering water scent or rough texture in the fur. Damp fur can cause discomfort, skin irritation, and may quickly lead to matting, especially in long-haired breeds.
Watch for your dog’s reaction to the drying process. Shaking after towel drying usually signals it’s time to reduce water and move on to brushing or blow drying. Overly wet or dripping fur means repeat drying steps until no moisture remains to avoid skin issues or chills.
8. Handle Difficult Dogs: Training Tips and Tools for Bath Resistance
Bathing dogs that resist or show fear takes patience, preparation, and sometimes extra help. Using positive reinforcement, the right tools, and step-by-step training can make baths less stressful for both you and your dog. Knowing when to seek professional grooming or training support also ensures your dog gets the care needed without harm or excessive stress.
Using Treats and Calm Praise
Treats serve as one of the most effective ways to help anxious dogs tolerate bath time. Offer small, tasty treats throughout the process to reward calm behavior and cooperation. For example, give a treat when your dog steps into the tub, during shampooing, and after rinsing. Calm praise, using a gentle voice, reassures your dog that bath time is safe and under control.
Timing is key: deliver rewards immediately so your dog connects a positive experience with the bath. Avoid overwhelming your dog with too many treats at once; instead, space out rewards over 10 to 15 minutes. When your dog shows signs of stress, pause and give extra treats paired with soothing words to help them regain calm. Using this approach consistently builds a positive association, gradually making baths less frightening.
Bathing Tools for Control and Safety
Specialized tools increase safety for you and your dog during difficult baths. Non-slip mats provide stable footing and reduce slipping, which can scare nervous dogs further. A bath harness or leash attachment designed for tubs helps keep your dog secure without harsh restraint. These cost between $10 and $30, depending on size and quality.
Using a handheld sprayer with adjustable water flow reduces noise and pressure surprises that spook dogs. Keep water temperature mild, around 85°F to 90°F, to avoid discomfort. Soft sponges and dog-friendly shampoos prevent irritation, which can cause resistance. Avoid forcing your dog; instead, use tools to maintain gentle control and slow movements to prevent panic or injury.
Gradual Desensitization Training Steps
Training dogs who hate baths starts well before water or soap enters the picture. Begin by encouraging your dog to approach and explore the bathing area without water. Use treats and play to create positive experiences around the tub or sink over several sessions. This initial step may take multiple short visits, especially with strongly fearful dogs.
Next, introduce water sounds at low volume, rewarding calm behavior to reduce noise sensitivity. Gradually add small amounts of water on your dog’s paws and body over days or weeks. Patience is essential; do not rush, and end on a positive note each session. Once your dog tolerates water contact, shorter baths with gentle handling and praise can start. Consistency will turn a fearful dog into one that stands calmly or even looks forward to baths.
Recognizing When to Call a Professional
Some dogs require professional intervention if their fear or aggression makes home bathing unsafe or ineffective. Consider a Fear Free Certified groomer or one who uses positive reinforcement techniques, particularly if your dog becomes highly reactive or injuries occur. Professional groomers have experience managing difficult dogs and specialized equipment to reduce stress and risk.
In-home bathing services can also benefit owners lacking appropriate bathing space or those with large dogs. Licensed trainers or behaviorists can offer desensitization programs tailored to extreme anxiety or resistance. Should your training efforts stall after several weeks, or your dog shows signs of trauma before or after baths, reaching out to professionals can protect your dog’s well-being and your peace of mind.
Using a non-slip mat and bath harness can prevent accidents and make your dog feel more secure during stressful baths.
Step-by-Step Action Plan for Easier Dog Baths
Follow this plan to help your dog enjoy bath time more and make the process easier for both of you.
- Before You Start: Gather all necessary supplies and set the water temperature to lukewarm. You’ll know you’re ready if everything is within reach and the water feels comfortable to your inner wrist.
- Day 1: Create a calm environment by turning off loud appliances and speaking in soothing tones. Your dog should appear more relaxed and less stressed when you enter the bath area.
- Day 2: Brush your dog thoroughly before the bath to remove tangles and loose hair. You’ll notice fewer mats and less shedding in the tub.
- Day 3: Use cotton balls to gently protect your dog’s ears before wetting their fur. If your dog doesn’t shake its head rapidly after ear protection, it’s likely comfortable.
- Day 4: Introduce the water flow gradually, starting with a gentle stream on the legs and belly. Your dog should stay calm without trying to jump out or struggle.
- Day 5: Practice rinsing thoroughly, focusing on removing all shampoo. Run your hand through the fur to check for any slippery residue.
- Day 6: Dry your dog using a towel first, then a low-heat blow dryer if your dog tolerates it. Your dog should be mostly dry and not shivering.
- After 1 Week: Reinforce bath time as a positive experience by offering treats and praise immediately after. Your dog will look forward to bath time or show less resistance.
Frequently Asked Questions
How Do I Make Bath Time Less Scary for My Dog?
Introduce bath time early and keep the routine calm. Using steady movements and gentle water flow helps your dog feel safe and less anxious during baths.
Can Bathing My Dog After Exercise Make It Easier?
Exercising your dog before a bath can make them calmer and easier to handle. A tired dog is less likely to resist or get stressed during grooming.
Is It Better to Brush a Dog Before or After a Bath?
Brushing your dog before the bath makes removing dirt and knots easier. It prevents mats from tightening when wet and helps shampoo reach the skin.
How Can I Stop My Dog from Slipping in the Tub?
Use a non-slip mat to give your dog secure footing in the bath. Slipping causes stress and makes the dog less cooperative during washing.
Why Should I Avoid Sudden Water Sprays During Bath Time?
Sudden strong sprays can startle your dog and raise anxiety. Use lukewarm water with a gentle flow for comfort and to keep your dog calm.
What’s the Best Way to Clean a Dog’s Face Without Stress?
Use a damp washcloth instead of spraying water directly on the face. This protects sensitive areas like eyes and ears while still cleaning effectively.
Wrapping Up
Making bath time easier requires patience and consistent care. Start by creating a comfortable setting and using gentle techniques tailored to your dog’s needs. Try incorporating one new step today, like brushing before the bath, and notice how it changes your dog’s behavior during the next wash.