
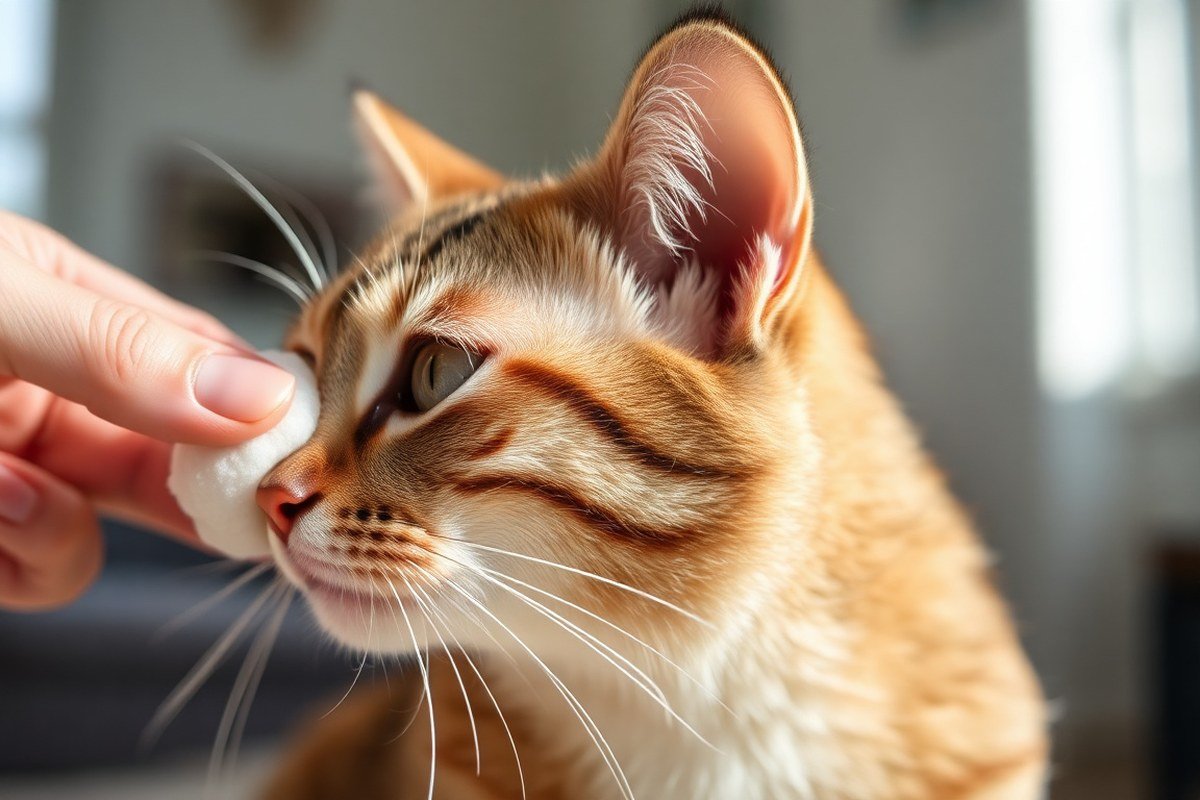
How to Clean a Cats Ears Safely: Complete Guide with Steps and Tips
Cleaning your cat’s ears involves gentle wiping with a vet-approved cleaner about once every two to three months, or as needed. Knowing how to clean a cats ears safely ensures you avoid injury or discomfort while helping maintain your pet’s ear health. This process typically takes around 10 minutes and can be done at home with the right supplies and approach.
This guidance is for cat owners looking to keep their pets comfortable and free of ear problems. You will learn effective cleaning steps, the best products to use, signs indicating your cat needs ear care, and how to handle a reluctant kitty during the process.
Key Takeaways
- Clean your cat’s ears every 2 to 3 months unless your vet suggests otherwise.
- Use a vet-approved, gentle ear cleaning solution designed specifically for cats.
- Allow 15 minutes between cleaning the ear and applying any medicated drops.
- Have a second person gently hold your cat to minimize stress during cleaning.
- Look for redness, discharge, or foul odor as signs your cat’s ears need veterinary attention.
- Avoid using cotton swabs inside the ear canal to prevent injury.
How to Clean a Cat’s Ears Step by Step

Cleaning your cat’s ears safely requires a gentle and careful approach to avoid injury and discomfort. Use only a vet-approved ear cleaning solution and cotton balls or gauze. Avoid Q-tips, alcohol, or harsh cleaners that can irritate the ear canal or damage delicate tissues. A calm cat and, if possible, a helper to gently hold your cat make the process smoother and safer.
Each cleaning step should be slow and deliberate, taking only a couple of minutes per ear. Focus on removing visible wax and debris from the outer ear without inserting anything deep into the ear canal. Massage the cleaner gently to loosen buildup, then wipe it away carefully. Repeat the process for the other ear, maintaining the same caution and care.
- Apply the Cleaner: Hold your cat’s ear flap upright and squeeze a small amount of the ear cleaning solution (about 3 to 5 drops) into the ear canal. Avoid spraying directly or using too much liquid. This solution softens wax and debris for easier removal.
- Massage the Base: Gently massage the base of your cat’s ear for 20 to 30 seconds. This helps distribute the cleaner and breaks up hardened wax. You’ll hear a squishing sound, which means it’s working. Keep your hand steady to avoid startling your cat.
- Let Your Cat Shake: Allow your cat a moment to shake its head. This natural action helps bring loosened debris and excess liquid toward the outer ear.
- Wipe the Outer Ear: Use a soft cotton ball or gauze to wipe away wax and cleaner from the ear flap and entrance of the ear canal. Wipe gently and never push the cotton deep inside. Change to a clean cotton ball if needed, and avoid Q-tips, which can cause injury.
- Repeat on the Other Ear: Follow the same sequence, apply the cleaner, massage, let your cat shake, then wipe gently. Use fresh cotton balls or gauze to prevent cross-contamination between ears.
- Reward Your Cat: Give treats and praise to keep your cat calm and cooperative in future cleanings. A positive experience lowers stress for both of you.
Cleaning should take about five minutes total to avoid frustrating or stressing your cat. Stop immediately if your cat shows signs of pain, redness, discharge, or odor, and contact your veterinarian. Regular cleaning should be done only when wax or debris is visible, following your vet’s guidance to prevent irritation or infection.
When and How Often to Clean Your Cat’s Ears

Cleaning your cat’s ears depends largely on their individual health, environment, and grooming habits. Most cats do not need frequent ear cleanings because they groom themselves effectively. For many cats, cleaning ears once every two to three months is sufficient, unless your veterinarian advises otherwise. Overcleaning can lead to irritation or drying of the ear canal, increasing the risk of infections or damage.
To decide when to clean your cat’s ears, observe their ears regularly. Signs like excessive wax buildup, visible dirt, dark discharge, a foul smell, redness, or your cat scratching or shaking its head frequently suggest it’s time for a cleaning. However, if your cat’s ears look clean and show no signs of discomfort or infection, skipping a cleaning is often better to avoid disrupting their natural ear environment.
Your cat’s surroundings also influence cleaning frequency. Cats that spend time outdoors or in dusty environments may accumulate more debris and require more regular cleanings. Similarly, older cats or those with ear canal shape abnormalities might need attention more often. Cats with medical issues, such as ear mites or frequent infections, should follow a cleaning schedule recommended by a veterinarian, which might be more frequent but carefully managed to avoid irritation.
Integrating ear checks into your regular grooming routine lets you spot issues early. Aim to check your cat’s ears at least monthly and clean both ears on the same day if cleaning is needed. Use only vet-approved ear cleaning solutions and avoid cotton swabs that can push debris deeper or damage the eardrum. Mild rubbing with a cotton ball or gauze works best. Always be gentle and stop if your cat resists strongly.
Here’s a simple checklist: first, look for visible dirt or discharge and ask if your cat shows signs of ear discomfort. Second, consider your cat’s environment and health history. Third, consult your vet especially if you notice pain, swelling, or foul odor, as these require professional treatment. If there’s minimal debris and no symptoms, it’s OK to hold off cleaning. When cleaning, keep the amount of cleaning solution small, just enough to moisten the ear canal, and avoid harsh products like hydrogen peroxide or alcohol.
Cleaning your cat’s ears too often or with the wrong products can harm their delicate ear canals, so always follow your veterinarian’s advice on timing and method.
The Best Supplies and Products for Cat Ear Cleaning
Choose an ear cleaner made specifically for cats to protect their sensitive ears. Avoid hydrogen peroxide, alcohol, and human ear products because they dry out or irritate the delicate skin inside a cat’s ear canal. Use only vet-approved products designed for feline ears. They are tested to be gentle while effectively removing wax, dirt, and debris.
Skip cotton swabs like Q-tips®, which can push debris deeper or damage the eardrum. Instead, use soft cotton balls or sterile gauze pads. They absorb cleaning solution and wipe the ear safely without risk of injury.
Medicated ear cleaners are only necessary if your vet diagnoses an infection or specific condition. For routine cleaning, basic, plain cleansers are best. Some cat ear wipes are convenient for gentle cleaning without liquid application but double-check ingredients to avoid irritants.
| Product Type | Use | Key Feature | Example Brand |
|---|---|---|---|
| Feline-specific ear cleaning solution | Remove earwax and dirt | Gentle formula, vet-approved | Vetnique Labs® Oticbliss™ Ear Cleaner |
| Cat ear wipes | Surface cleaning, soothing | Contains soothing agents like aloe vera | Petpost™ Ear Wipes with Coconut Oil & Aloe Vera |
| Cotton balls or gauze pads | Wiping solution from ear | Soft, non-abrasive, safe | Standard medical gauze or cosmetic-grade cotton balls |
| Cotton swabs (Q-tips®) | Not recommended for cats | Risk of injury, pushes debris deeper | None recommended |
| Hydrogen peroxide or alcohol | Not safe for cat ears | Irritates and damages ear skin | None recommended |
Vet-approved cat ear cleaners often cost between $10 and $20 for a 4-ounce bottle and usually suffice for many cleanings. Cat ear wipes come in packs for around $10 to $15. Use only as directed, applying the solution to cotton or gauze and wiping the visible outer ear folds and canal entrance. Good results show ears that appear clean, feel smooth (not greasy or scabby), have a pale pink color, and no strong odour. Stop if your cat shows pain or persistent fussiness, and consult your vet.
Signs Your Cat’s Ears Need Cleaning or Vet Attention
Healthy cat ears appear clean with minimal wax, no foul smell, and no visible redness or swelling. Typically, their ear canals are free from excessive debris, and the skin inside looks smooth and pale pink. It’s normal to find some wax or dirt near or in the ear, but this should be light and not cause discomfort. Checking your cat’s ears is best done gently: hold your cat securely in your lap or on a stable surface, softly tilt their head, and look inside using natural light or a flashlight while avoiding deep probing.
Signs that suggest an ear cleaning or veterinary visit is needed include noticeable earwax buildup, which often looks like brown or black debris filling the ear canal and may be accompanied by your cat scratching or rubbing their ears frequently. Abnormal discharge, such as thick green, yellow, red, or black material oozing from the ears, is a clear warning sign. These colors usually indicate infection or the presence of ear mites. Unlike normal wax, this discharge often has a strong or unpleasant odor.
Other symptoms that require attention include redness and swelling inside or around the ear flap, sensitivity or pain when you gently touch the area, and your cat shaking their head repeatedly. A foul odor coming from the ears is often linked to bacterial or yeast infections. If the debris returns rapidly after cleaning or your cat shows ongoing discomfort, it’s important to stop home treatments and consult your vet.
When inspecting your cat’s ears, approach calmly and avoid causing stress. Use a soft cloth or cotton ball to wipe just the outer parts of the ear. Do not insert anything deep into the canal, as this can cause injury. Checking every one to two weeks is enough for indoor cats with no symptoms, but those prone to ear problems might need more frequent monitoring. Before attempting any cleaning, get veterinary approval, especially if you notice redness, swelling, discharge, or odor, since these conditions might require medication first.
Monitoring your cat’s ears regularly and noticing changes early can prevent serious issues. Immediate vet consultation is necessary if you detect dark red or black discharge, significant swelling, unbearable pain, or if your cat refuses ear handling due to discomfort. These signs often indicate infections or mites that need professional treatment and are not resolved by simple cleaning at home.
Common Mistakes When Cleaning Cat Ears and How to Avoid Them
Common mistakes during ear cleaning can cause pain, irritation, or infections in your cat’s sensitive ears. Knowing how to avoid these errors helps keep your cat comfortable and healthy. Using gentle techniques, the right tools, proper products, and a calm approach are essential for safe ear care.
Using Q-Tips or Cotton Swabs
Using Q-tips or cotton swabs can be dangerous because they often push dirt further into the ear canal, leading to injury or a burst eardrum. Cats have narrow, angled ear canals, so placing objects inside can cause harm or discomfort. A better option is to use a soft cotton ball or gauze to clean only the outer parts of the ear after applying a cat-safe ear cleaner.
Gentle wiping combined with your cat’s natural head shaking helps remove dirt without risking harm. Avoid inserting any tools deep into the ear canal to prevent injury and irritation.
Frequency and Cleaning Depth Mistakes
Cleaning your cat’s ears too often can irritate the ear canal rather than improving ear health. Most healthy cats do not require routine ear cleaning because self-grooming and natural ear structure maintain cleanliness. Only clean ears when there are visible signs of wax buildup or debris on the outer part of the ear.
Cleaning should always stay limited to the outer ear folds and ear flap (pinna). Inserting anything into the ear canal can cause pain and infection. It’s best to clean ears just before baths to avoid trapping water inside.
| Common Mistake | Potential Consequence | Safer Alternative |
|---|---|---|
| Using cotton swabs/Q-tips deep in ear canal | Risk of injury, ruptured eardrum, pushing debris deeper | Use soft cotton ball/gauze on outer ear only |
| Cleaning ears too often | Irritation and inflammation of ear canal | Clean only when dirt is visible; trust self-grooming |
| Cleaning inside ear canal | Pain, infection, trauma to eardrum or skin | Clean surface of ear flap only |
| Using harsh soaps or shampoos | Ear irritation or allergic reaction | Use vet-recommended ear cleaners or mild solutions |
This table highlights common errors and safer alternatives to keep your cat’s ears healthy and pain-free.
Choosing Appropriate Cleaner
Using human products like soaps, shampoos, or hydrogen peroxide can be too harsh and irritating for your cat’s delicate ears. Many household cleansers contain chemicals that disrupt the natural ear environment, causing dryness, inflammation, or allergic reactions.
Vet-approved ear cleaning solutions or gentle homemade mixtures of apple cider vinegar diluted with water (equal parts) are safer options. Avoid any cleaner with alcohol or strong fragrances. Always read labels to confirm suitability for cats.
Handling Difficult Cats
Some cats may resist ear cleaning by struggling or becoming anxious. To manage this safely, prepare a quiet space and calmly hold your cat using gentle but firm restraint. Wrapping your cat snugly in a towel can help prevent sudden movements. Speak softly and offer treats before and after to reduce stress.
Another tip is keeping sessions short and positive, cleaning just one ear at a time if needed. Your cat’s strong resistance or clear signs of pain means it’s best to stop cleaning and seek advice from your veterinarian instead of continuing.
Never force your cat’s head down or insert cleaning tools deep into the ear; it risks painful injury and may worsen your cat’s stress.
How to Prepare and Calm Your Cat Before Cleaning
Preparing your cat before ear cleaning is key to reducing stress and preventing injury. Slow introduction, a calm setting, gentle handling, and using treats help your cat associate ear cleaning with a positive experience. For very anxious or aggressive cats, extra patience or professional help may be required.
Creating a Calm Environment
Choose a quiet room with minimal distractions and soft lighting to reduce anxiety. Avoid loud noises or interruptions that could startle your cat. Aim to clean ears during a time when your cat is naturally calm, such as after a meal or a play session.
Clear your supplies ahead of time to prevent pauses that might upset your cat’s mood. A soft towel or mat can create a comfortable surface and prevent slipping. Temperature in the room should be moderate, around 68 to 72°F, because cold or hot surroundings can increase stress levels.
Gentle Handling Techniques
Support your cat securely without squeezing or restraining too tightly. Wrapping your cat gently in a soft towel can keep them still while calming them. Keep one hand free to clean and the other to steady your cat’s head. Avoid sudden movements that may trigger resistance.
Having another person help can make the process safer and less stressful. The helper can hold or soothe the cat while you focus on cleaning. Both should speak softly and move calmly to maintain a peaceful atmosphere.
- Prepare a soft surface and gather supplies within reach.
- Gently untangle your cat’s fur around the ears before starting.
- Wrap your cat snuggly in a towel, leaving the head exposed.
- Ask your helper to hold your cat comfortably, supporting the body and head.
- Use one hand to steady the head gently, avoiding pressure on the neck.
- Proceed with cleaning using steady, slow movements.
- Pause to calm your cat if it becomes restless or upset.
Using Treats and Positive Reinforcement
Offer your cat small, tasty treats before, during, and after ear cleaning to build positive associations. Praise your cat softly and calmly to reinforce good behavior. Avoid punishing or scolding, which will increase anxiety and make future cleanings harder.
For cats showing high anxiety, try shorter sessions starting with just touching around the ears before moving to full cleaning. Use treats consistently to reward bravery and cooperation. Over time, your cat learns that ear cleaning is a safe, even enjoyable, routine.
What to Do If Your Cat Resists Ear Cleaning
Cleaning a cat’s ears can be challenging if they resist, but safely managing their discomfort is essential. Stop cleaning immediately if your cat struggles violently or shows signs of pain like crying, scratching, or biting. Continuing can cause injury to the ear canal or harm to you. A good rule is to keep each session under two minutes and to stop if the cat becomes overly stressed.
To safely restrain a reluctant cat, wrap them snugly in a thick towel, leaving only the head exposed. This prevents scratching and sudden movements. You can seat yourself in a stable chair and place your cat on your lap facing away from you for better control. Avoid forcing the ear open; instead, gently lift the ear flap with your fingers.
Trying later is often better than forcing the issue. Give your cat time to calm down and try again after an hour or the next day. Use calm, soothing tones and offer small treats to create a positive association with ear cleaning. Regular gentle touch around the head and ears on non-cleaning days can also reduce resistance over time.
When your cat consistently refuses ear cleaning or shows signs like unusual discharge, odor, or redness, consulting your veterinarian is the best option. They may perform a thorough ear cleaning during a visit or recommend a professional grooming service that includes ear care. In some areas, professional cat groomers charge between $40 and $70 for this service, which can save stress for both you and your cat.
Preventing future resistance starts with making ear cleaning a routine part of your cat’s care early on. Begin by gently handling your cat’s ears when they are calm, and gradually introduce the cleaning process in small steps. Avoid sudden movements and use only cat-safe cleaning solutions. Should your cat react negatively, pause and try again later, using treats and affection to help reduce anxiety with positive reinforcement.
When to Seek Veterinary Care for Cat Ear Issues
Seek veterinary care immediately if your cat shows signs of severe ear problems such as persistent discharge, swelling, or intense scratching that causes pain. Describing the symptoms clearly and following the vet’s instructions after treatment is essential for your cat’s recovery. Professional ear cleaning is a safe option and may be necessary for chronic or severe cases, with costs depending on the clinic and the treatment needed.
Warning Signs That Need Vet Care
Look for discharge from the ear that is dark, yellow, or foul-smelling, which could indicate infection. Swelling or redness inside the ear or around it often signals inflammation or an allergic reaction. If your cat scratches intensely at their ears or shakes their head frequently, these behaviors suggest discomfort or pain that should not be ignored. Sudden changes in behavior, such as withdrawal or irritability, can accompany ear problems that need professional evaluation.
Describe symptoms in detail to the vet, including how long signs have been present, any visible discharge or swelling, and whether your cat shows sensitivity when the ear is touched. Mention any previous ear infections or treatments your cat has had because this history helps the vet choose the right care plan. A clear description supports accurate diagnosis and efficient treatment.
Veterinary Ear Cleaning Services
Veterinarians can perform a thorough ear cleaning using tools and solutions safe for cats, which often includes removing debris and applying medications if infections are present. They may recommend cleaning intervals based on the severity and cause of ear issues, especially for cats with chronic problems. Many vets offer consultations to teach you how to clean ears at home safely and reduce the risk of injury.
The cost for professional ear cleaning varies widely by location and clinic but typically ranges from $50 to $150 per visit, which may include examination, cleaning, and medication. Severe infections requiring additional diagnostics or treatments can increase the expense. Discuss fees upfront with your vet to prepare financially and understand what is covered during the visit.
Post-Treatment Ear Care
Follow the vet’s instructions carefully for home care after professional ear cleaning. This may include administering prescribed ear drops or cleaning at specified intervals to prevent re-infection. Use only the vet-recommended products, and avoid inserting cotton swabs deep into your cat’s ear canal, as this can cause injury.
Keep a close eye on your cat’s ear condition during the recovery period. Note any return of symptoms or worsening signs, and contact your vet promptly if issues persist beyond the expected healing time or if your cat shows discomfort when you touch the ears. Regular follow-up visits might be necessary for cats prone to ongoing ear problems to maintain ear health effectively.
Always describe your cat’s ear symptoms clearly when contacting your vet to ensure prompt and accurate treatment.
Step-by-Step Action Plan for Cleaning Your Cat’s Ears
Follow these clear steps to safely clean your cat’s ears and keep them healthy. Check each step to confirm your cat’s comfort and cleanliness.
- Before You Start: Gather all supplies like a vet-approved ear cleaner, cotton balls, and treats. Having everything ready makes the process smoother and less stressful.
- Day 1: Gently inspect your cat’s ears for dirt or redness. When your cat’s ears look clean and don’t have any odor, you can skip cleaning because your current method is effective.
- Week 1: Start with a calm petting session, then apply a small amount of cleaner to each ear. Massage the base of the ear to loosen debris, then wipe it out with a cotton ball. Ear cleanliness and calm behavior show success.
- Week 2: Repeat the cleaning once or twice if needed, monitoring for irritation or resistance. Improved ear appearance and relaxed cat indicate you’re on the right track.
- Every Month: Check ears regularly for wax buildup or signs of infection. Cleaning only as needed helps prevent discomfort or damage.
- Your Cat Resists: Pause and allow your cat a break, using calming methods or treats before trying again. Patience helps avoid stress and injury.
- You Notice Problems: Take your cat to the vet if you see redness, swelling, a bad smell, or if your cat scratches its ears a lot. Early treatment avoids complications.
Frequently Asked Questions
Can I Use Human Ear Cleaning Solutions on My Cat?
No, human ear sprays and drops can irritate your cat’s ears. Use products specifically made for cats to avoid harmful reactions. Always check the label before use.
Is It Normal for Cat Ears to Have a Slight Odor?
A mild smell can be normal, but a strong or foul odor may signal infection. If the smell persists or worsens, consult your veterinarian promptly.
Can Ear Mites Be Cleaned Out at Home Safely?
You should not attempt to clean ear mites yourself. A vet can diagnose and prescribe the appropriate medication for safe and effective treatment.
How Do I Prevent My Cat from Shaking Its Head During Ear Cleaning?
Gently hold your cat’s head steady and work quickly but calmly. Having a helper to support your cat can reduce head shaking and make the process smoother.
What If My Cat’s Ears Bleed During Cleaning?
Stop immediately if you see blood, as this can indicate injury. Consult your vet before attempting to clean the ears further to prevent complications.
Is It Okay to Dry My Cat’s Ears After Cleaning?
Yes, gently drying with a soft cloth after cleaning prevents moisture buildup. Avoid cotton swabs inside the ear canal to protect delicate ear tissues.
Key Points to Remember
Regular, gentle ear cleaning protects your cat’s comfort and health without causing stress or injury. Try checking your cat’s ears today to see if they need cleaning, and take it slow to build trust. Keeping an eye on your cat’s ear condition helps you catch problems early and keeps your cat feeling good.