
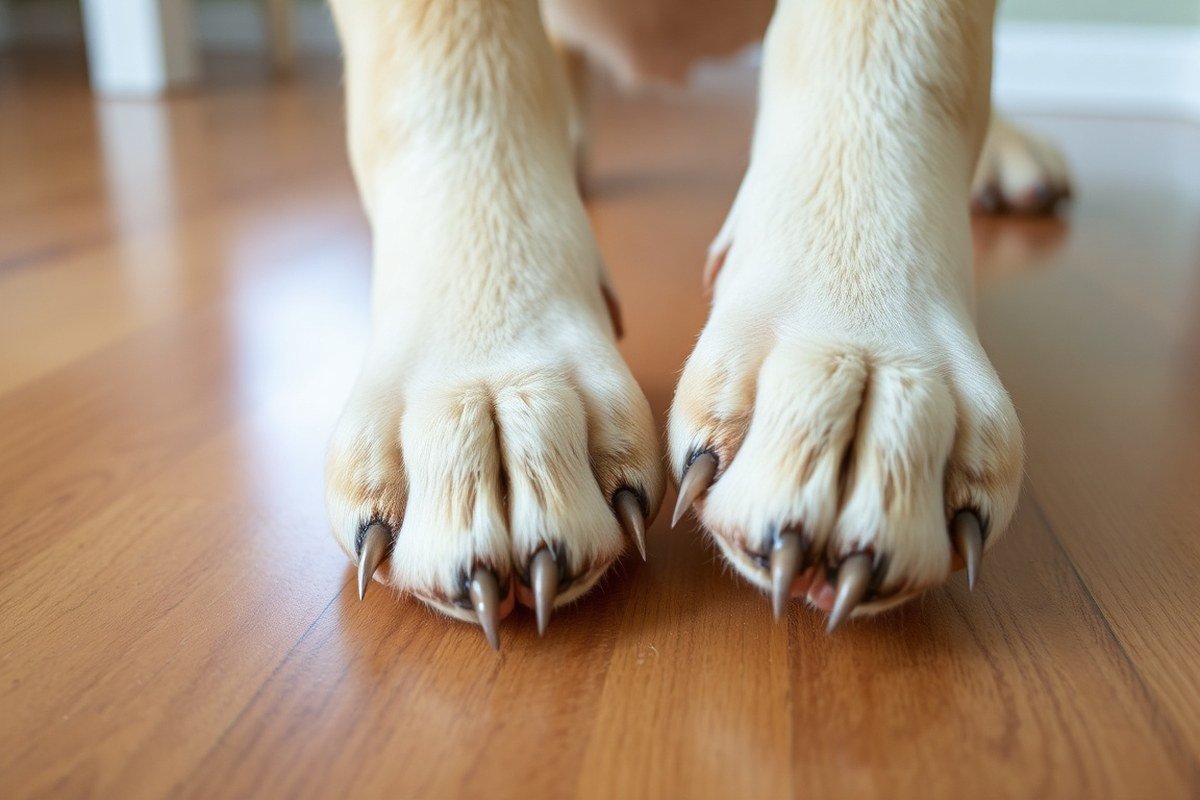
How Do You Know When a Dog’s Nails Are Too Long? Signs, Risks & Solutions
You know a dog’s nails are too long if you hear clicking on hard floors, notice your dog walking gingerly, or see nails curving downward. Long nails can cause pain, catch on surfaces, and lead to problems like splitting or infection. This information is for dog owners who want to keep their pets comfortable and healthy by managing nail length properly.
Following clear signs and understanding nail care basics helps prevent discomfort and health issues. Practical advice covers how to spot overgrown nails, risks involved, trimming frequency, and choosing the right tools for safe nail maintenance.
Key Takeaways
- Check your dog’s nails weekly for length, sound of clicking, and signs of discomfort while walking.
- A dog’s nails that touch the ground or curve under need trimming to avoid pain and injury.
- Trim small amounts every 3 to 4 weeks, adjusting based on your dog’s activity and nail growth.
- Use guillotine-style clippers for small to medium dogs and stronger tools for larger, thicker nails.
- Long nails increase risks of splitting, infection, and painful walking, so keep nails short but avoid cutting the quick.
- Look for swollen or infected nails, and seek veterinary help if trimming causes pain or bleeding.
How to Tell If Your Dog’s Nails Are Too Long
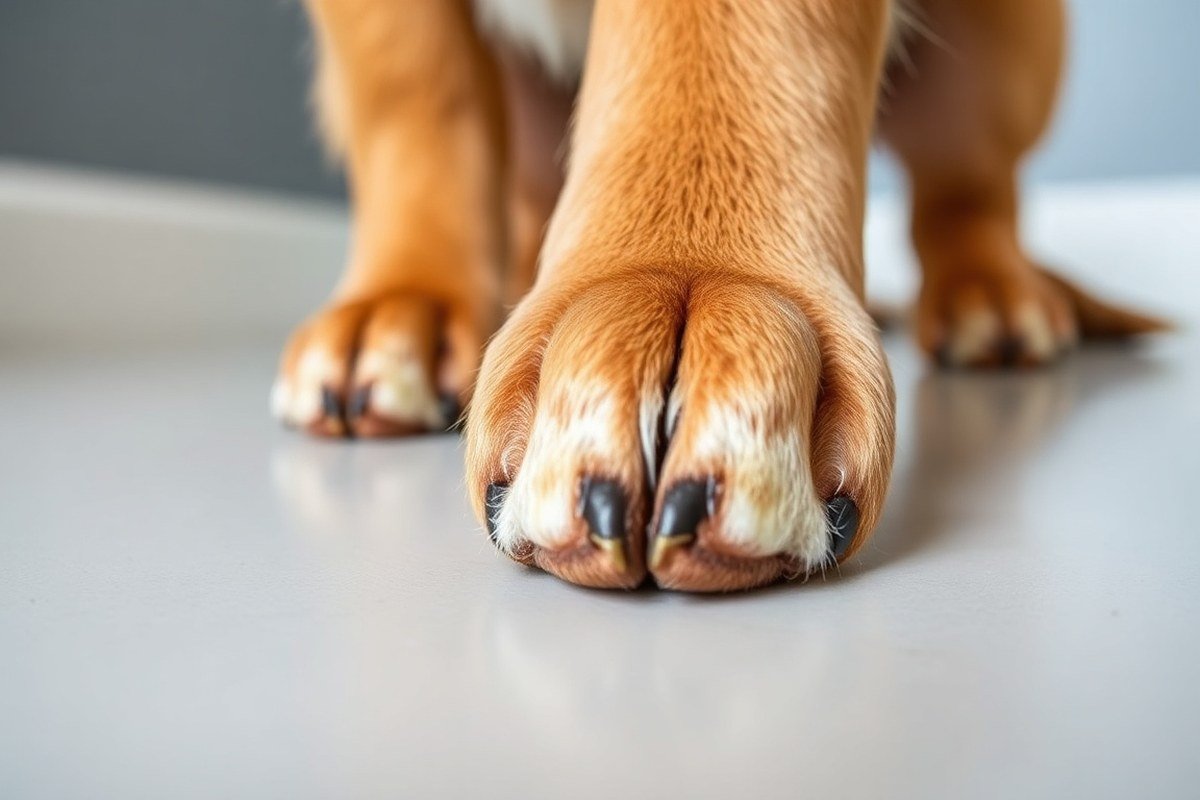
Checking your dog’s nails involves a detailed look and observing how they act. Nails that have grown too long stick out beyond the paw pads and may bend over, making contact with the ground while standing. This uneven footing shifts your dog’s weight, potentially causing discomfort and posture issues.
Auditory clues, like the clicking sound of nails on hard floors, usually mean the nails are long enough to reach the surface before the paw pads do. This clicking isn’t just annoying, it signals that your dog is walking on hard nail tips rather than their pads, which can cause slipping or limping on slick surfaces such as hardwood or tile.
Behaviorally, dogs with excessively long nails may lick their paws after walks due to pressure pain or discomfort. They might also walk gingerly or limp to avoid putting stress on their feet. You might notice your dog scratching more with their nails catching on carpeting or furniture.
- Nails visibly extend beyond paw pads and may curve downward
- Clicking sounds when walking on hard floors
- Limping or walking carefully, especially on slippery surfaces
- Dogs lick paws after walks, indicating pressure pain
- Nails catch on carpets, furniture, or clothing
- Posture or gait changes, such as standing at awkward angles
Checking nail length with a simple measurement can clarify if trimming is needed. A nail pressing against the floor as your dog stands on its own indicates it’s overgrown. Overgrown nails can cause joint pain by shifting toe angles and reducing proper footpad contact with the ground. This repeated strain can lead to arthritis and inflammation over time.
Keeping an eye on these signs can prevent discomfort or injury. Watch how your dog moves and listen for nail sounds, and inspect paws regularly. Prompt nail trimming avoids slipping, limping, and the pain that comes with long nails pressing on sensitive areas under the paw. Regular maintenance helps your dog stay comfortable and active.
Why Long Nails Affect Your Dog’s Health and Comfort
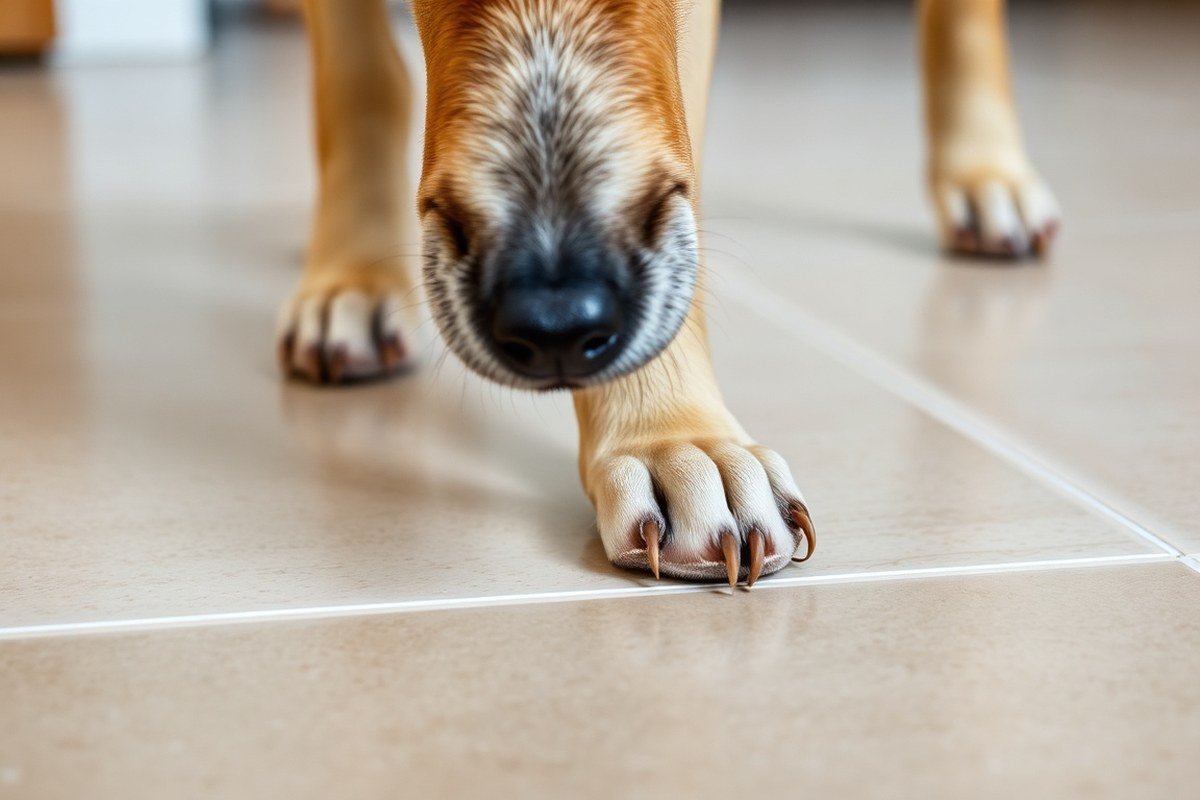
Long nails can cause significant pain and health problems for your dog by putting extra pressure on the toe joints. This pressure happens because the nail length shifts some of the dog’s weight away from the paw pads to the toes, which are not designed to carry that load. Over time, this added strain can alter the dog’s natural gait, making walking uncomfortable and even causing balance issues. A dog with long nails might change how it walks, which can lead to stiffness or limping as the joints and muscles adjust awkwardly.
The impact on walking and balance is more than just a mild inconvenience. Dogs with improperly trimmed nails can develop mobility problems because their toes and joints are no longer aligned correctly. This misalignment can extend up the legs and spine, leading to problems beyond just the feet. For example, altered joint angles can increase the risk of arthritis flare-ups over time. If your dog shows stiffness or slows down during walks, it could be because the nails are causing discomfort or affecting the spine’s natural alignment.
Ignoring your dog’s nail length can also lead to more severe health issues. When nails grow too long, the risk of nails breaking, splitting, or growing into the skin (ingrown nails) rises. These conditions cause pain and may lead to infections that require veterinary treatment. In some severe cases, nerve damage can occur, causing lasting discomfort. Maintaining regular nail care prevents these issues and keeps your dog comfortable and active.
Regularly trimming your dog’s nails every 3 to 4 weeks supports long-term paw health by preventing overgrowth that leads to these problems. Checking your dog’s nails for clicking sounds on hard floors or watching for signs of discomfort while walking can help you catch overgrown nails early. Dogs with thick or hard nails might need special clippers or professional help to ensure safe trimming without causing stress or injury.
Listen for a clicking noise when your dog walks on hard floors; it’s a clear sign their nails need trimming to avoid pain and mobility problems.
Understanding the Quick and Its Role in Nail Trimming
The quick is the sensitive part inside your dog’s nail that contains nerves and blood vessels. Avoiding it during trimming prevents pain and bleeding. Knowing how to identify and trim safely around the quick is key to comfortable nail care.
What Is the Quick and Why It Matters
The quick is the living tissue inside each nail, running from the base up to near the tip. It contains blood vessels and nerve endings, so it’s very sensitive. When nails are allowed to grow too long, the quick grows longer as well, extending into the nail. Cutting into the quick causes pain and bleeding, which may make your dog wary of future nail trims.
Protecting the quick is important because trimming nails too short can injure your dog and increase anxiety around grooming. Knowing where the quick ends helps you trim safely, keeping your dog comfortable and preventing injuries.
Identifying the Quick in Light and Dark Nails
With light-colored nails, the quick usually appears as a soft pink line or central dot running through the nail. This makes it easier to see how far you can trim. Cut at a 45-degree angle to avoid cutting into the quick. Take small amounts off at a time to prevent accidental cuts, especially if the nails are long.
Dark nails make it harder to see the quick because its color blends with the nail. You can look for a small, darker central area or use a nail light tool designed to help make the quick visible. Another method is to trim very small amounts gradually and check your dog’s reaction as you go. Use clippers that give you good control and proceed slowly to reduce the risk.
Emergency Steps If the Quick Is Cut
Cutting the quick causes bleeding and pain, but quick action can stop the bleeding and prevent infection. Styptic powder is the preferred treatment to help blood clot. Applying gentle pressure holds the powder in place and encourages healing.
Keep a styptic powder or pencil ready in your nail care kit. If you don’t have these, a clean cloth or cornstarch can help slow bleeding temporarily until you can get proper treatment. Here are steps to take immediately after cutting into the quick:
- Stay calm to avoid stressing your dog further.
- Apply styptic powder directly on the bleeding nail tip.
- Press gently but firmly for around 30 seconds to allow clotting.
- Clean the area carefully with a damp cloth after bleeding stops.
- Keep the affected paw clean and dry over the next day.
- Offer your dog comfort and praise to rebuild positive associations.
- Consider a break before trying to trim nails again.
- Contact your veterinarian if bleeding continues or signs of infection appear.
How Often to Trim Your Dog’s Nails and Routine Checks
Nail trimming frequency depends largely on your dog’s age, activity level, and nail growth rate. For most dogs, trimming every three to four weeks works well. You’ll want to monitor nail growth regularly and adjust this schedule if you notice changes in how often their nails need attention.
Puppies often need more frequent checks because their nails grow quickly. Since they’re still developing their walking habits, their nails don’t get as much natural wear. For puppies, check nails weekly and trim as soon as you hear clicking or see nail tips touching the floor.
Active dogs that walk or run on hard surfaces naturally wear down their nails more than indoor-only dogs. When your dog spends a lot of time on hardwood or pavement, you might notice needing to trim their nails less often. Conversely, small dogs and less active dogs usually need faster nail growth managed with more regular trimming.
Diet and health conditions impact nail growth too. Health issues like hypothyroidism or Cushing’s disease can cause nails to grow unusually fast or slow, so consult your vet if you see rapid changes. Balanced nutrition supports strong nails but doesn’t guarantee slower growth. To keep track of your dog’s nail growth over time, use this simple checklist at least once a week:
- Listen for clicking sounds when your dog walks on hard floors.
- Look at nail tips to see if they extend past the paw pads.
- Notice if your dog scratches you more often, which can indicate long nails.
- Check for any signs your dog licks or bites at their paws unusually.
- Note any difficulty or changes in your dog’s gait or posture.
Once you recognize these signs, plan a trim session. For dogs with dark nails where the quick isn’t visible, trim small amounts at a time until you see a lighter oval shape inside the nail. This helps avoid cutting into the quick. Here’s a helpful comparison of trims needed based on age and activity:
| Dog Type | Nail Trim Frequency | Reason |
|---|---|---|
| Puppies | Weekly | Fast nail growth, little natural wear |
| Active adult dogs | Every 3-4 weeks | Natural wear plus moderate growth |
| Less active or small dogs | Every 2-3 weeks | Little natural wear, faster buildup |
| Dogs with health conditions | Check with vet for schedule | Growth rate may vary due to illness |
Tracking nail health is a simple part of supporting your dog’s comfort. Adjust trimming based on what you observe. When your dog’s nails grow too long and become hard to trim safely, a groomer or veterinarian can provide professional help.
Choosing the Right Nail Trimming Tools for Your Dog
Choosing the right nail trimming tool depends on your dog’s size, nail thickness, and your comfort level with each type. Guillotine clippers suit small to medium dogs, scissor-style clippers work well for larger or thicker nails, and rotary grinders offer a smooth finish and are useful for dogs with hard or very long nails. A proper fit and tool type reduce the risk of injury and improve trimming results.
Guillotine Clippers: Pros and Cons
Guillotine clippers feature a hole where you insert the dog’s nail, then a blade cuts across the end when you squeeze the handles. They work well for small to medium-sized dogs because they offer good control over the cut and make quick work of normal nails.
However, they struggle with thick or very long nails typical of larger breeds. If the clipper blade is dull or the nail too thick, the nail can splinter or crush, causing discomfort. These clippers generally cost between $10 to $25. Using guillotine clippers requires steady hands and proper positioning to avoid injuring the quick, the sensitive part inside the nail.
Scissor-Style Clippers: When to Use
Scissor-style clippers have two blades like scissors and are sturdy enough to handle thick, tough nails. They’re especially useful for large dogs with thick nails where guillotine clippers might be too weak. Their design allows you to see the nail more clearly and make precise cuts.
For dogs with thick or hard nails, these clippers reduce the risk of splitting or crushing the nail. They cost around $15 to $35 depending on brand and size. That said, they require more hand strength and careful technique because the blades don’t automatically limit how much nail you cut. Always trim small amounts, gradually working down to avoid cutting into the quick.
Rotary Grinders: Benefits and Cautions
Rotary grinders work by filing the nail down rather than cutting it. They hold an advantage when dealing with long nails due to the gradual trimming process, which lowers the chance of hitting the quick. They’re effective at reducing splits or splinters since the grinding smooths the nail edge.
These tools suit all dog sizes but are especially good for dogs anxious about clipping. The slower process also allows gradual shaping, which is helpful for dogs with curved or curled nails. Rotary grinders typically cost $20 to $50 and require access to a power source or batteries. However, some dogs can be sensitive to the noise and vibrations, which means you may need patience and positive training.
| Tool Type | Best For | Dog Size | Cost Range | Key Advantage | Potential Drawbacks |
|---|---|---|---|---|---|
| Guillotine Clippers | Small to medium nails | Small to medium dogs | $10, $25 | Good control, quick cuts | Not strong for thick nails, risk of crushing |
| Scissor-Style Clippers | Thick or hard nails | Medium to large dogs | $15, $35 | Strong blades, precise cuts | Requires hand strength, risk of overcutting |
| Rotary Grinders | Long, curved, or sensitive nails | All sizes | $20, $50 | Gradual trimming, smooth edges | Noise sensitivity, slower process |
Choosing the correct tool includes matching your dog’s nail size and thickness, plus considering your own ability to control the tool safely. Having styptic powder handy is key for quickly addressing any accidental bleeding.
Start slow with any new tool to help your dog get used to the sensation and avoid stressing them out during nail care sessions.
Step-by-Step Guide to Safely Trim Long Dog Nails
Trimming your dog’s nails safely requires patience and attention. Trim in small increments at a proper angle to avoid hitting the quick and causing pain. Using the right tools and technique helps ensure comfort and better outcomes.
Preparing Your Dog and Tools
Begin by selecting sharp, high-quality nail clippers designed for dogs, such as guillotine-style or scissor-style clippers. Having a nail file or grinder on hand can smooth rough edges after clipping. Prepare styptic powder or a styptic pencil to quickly stop bleeding in case you accidentally trim the quick.
Accustom your dog to having their paws handled before trimming. Use gentle restraint to keep them calm and steady, like holding them close or having someone assist. Let your dog sniff the tools and reward them with treats to create a positive association.
Proper Clipping Technique and Angle
Trimming nails at the correct angle reduces the risk of cutting into the quick. Hold your dog’s paw firmly but gently and clip the nail at a 45-degree angle, following the natural curve of the nail. Cut small bits rather than trying to remove large sections at once. This approach helps avoid sudden pain or bleeding.
Look for the quick, which appears as a pinkish area inside the nail of dogs with light-colored nails. For dark nails, trim thin slices slowly until you see a gray or black dot, signaling you’re close to the quick. Stop trimming as soon as you notice this.
Handling Very Long or Curved Nails
Very long nails may require trimming over several sessions rather than all at once. Cut off small amounts, about 1 to 2 millimeters, to gradually reduce length without hurting your dog. This slower approach lets the quick recede naturally over time.
For curved or thick nails, try positioning the clippers to cut from the top down, following the curve carefully. Avoid forcing the clipper through hard nails, as this can cause splits or cracking. Filing gently after trimming can help smooth uneven or rough edges.
Aftercare and Recognizing Signs of Discomfort
After trimming, check for signs your dog is uncomfortable, such as licking paws, limping, or guarding their feet. Use treats and praise to reinforce positive behavior and reduce stress for future trims. If you accidentally cut the quick, apply styptic powder immediately and hold gentle pressure until bleeding stops.
Regularly inspecting nails after walks or play helps you catch overdue trims early, avoiding discomfort caused by nails clicking on hard floors or altering your dog’s gait. Consistent nail care supports your dog’s comfort and mobility.
- Gather tools: dog nail clippers, nail file/grinder, styptic powder.
- Calmly hold your dog and introduce tools with treats.
- Inspect each nail; identify the quick if possible.
- Trim small sections at a 45-degree angle, following the nail’s curve.
- Pause frequently to avoid cutting the quick, especially on dark nails.
- For very long nails, trim over several days in small increments.
- File nails gently after clipping to smooth edges.
- Watch for signs of discomfort and apply styptic powder if bleeding occurs.
Signs Your Dog Is Uncomfortable Due to Long Nails
You might notice your dog licking their paws more often or scratching at their feet if their nails are too long. These behaviors usually mean your dog is trying to relieve pain or irritation caused by nails that curl inward or press uncomfortably into the pads. Limping or reluctance to walk can also indicate nail discomfort. When nails get overly long, your dog shifts their weight to avoid pressure on sore areas, which changes their gait and may cause limping or favoring one leg.
Preventing behavioral problems related to nail discomfort means acting early. Watch for subtle signs like your dog flinching when you touch their paws or refusing to go for walks they usually enjoy. Keeping nails trimmed to an appropriate length helps your dog walk evenly and comfortably. Notice paw licking paired with redness near the nail bed? Check the nails closely since this might mean they are pressing into the pads or exposing the quick. Long nails often split or break when they get caught on carpets or furniture, which leads to pain and possible infection. Keeping nails at a healthy length prevents these issues.
It’s important to check for early signs of infection or injury if your dog’s behavior hints at nail problems. Swelling, redness, or bleeding around the nail bed means you should stop any nail trimming and keep the area clean. A broken nail or a loose nail (known as a hangnail) requires treatment from a veterinarian. They might use sedation and pain medication to safely remove damaged parts and bandage the paw to prevent infection. Continuing discomfort, swelling, or ongoing licking and chewing at the paws need a vet’s evaluation to avoid worsening pain or infection.
Watching your dog closely after trimming is important, especially if nails have been cut too short. Signs of pain include limping and increased paw licking. Clean the paw with an antiseptic solution following the vet’s instructions to reduce infection risk. Avoid heavy activity for a day or two while the nail bed heals. Trimming nails gradually over several sessions helps your dog get used to the process and reduces the chance of cutting too far into the quick, which causes bleeding and pain.
Keeping an eye on your dog’s behavior daily makes a big difference in spotting nail-related discomfort. Adjust your routine nail checks to look at paws closely and notice any changes in how your dog walks or behaves. When nails interfere with their comfort, your dog’s behavior is the earliest warning you can act on to maintain their health and happiness.
Managing Dewclaws and Their Special Nail Needs
Dewclaws are the small nails located on the inside of a dog’s front legs, and sometimes on the back legs, hanging above the ground rather than making contact when the dog walks. Unlike regular nails, dewclaws typically do not wear down naturally because they don’t touch hard surfaces often. This means they require special attention during grooming sessions to prevent them from growing too long and causing issues.
Trimming dewclaws calls for care different from that used on other nails. Since they are less exposed to daily friction, dewclaws might need trimming more frequently, usually every 3 to 4 weeks, depending on your dog’s activity level and nail growth rate. You should hold the paw firmly but gently, isolate the dewclaw, and trim just a small amount at a time. Take care to avoid the quick, which is especially tricky with dewclaws because they can be less visible and grow unevenly. Slow and steady trimming protects your dog from pain and bleeding.
Ignoring dewclaw maintenance can lead to several risks. Overgrown dewclaws may curve or grow into the paw pad, causing pain, infections, or limping. If a dewclaw catches on objects or gets ripped, it can cause serious injuries that sometimes require veterinary care. Dogs with long, untrimmed dewclaws might also alter their gait, which can place unnecessary stress on joints and muscles. Regular trimming helps maintain straight edges and healthy growth, reducing the chance of these problems.
For dogs that do not walk on hard surfaces often, dewclaws can overgrow faster and harder to manage. Veterinary professionals or groomers are good options to handle trimming if you are uncomfortable or if your dog’s dewclaws are extremely long or dark-colored, since the quick is difficult to see and may cause bleeding if cut accidentally. You can expect professional trimming to cost between $10 and $30 per session. Continued regular care at home involves inspecting the dewclaws weekly, touching the nails to feel their length and curvature, and trimming as soon as you notice they extend beyond the skin or start to curve.
Regularly inspect and gently handle your dog’s dewclaws to prevent painful overgrowth and reduce the risk of injury during walks or play.
When to Seek Professional Help for Dog Nail Care
You should consider professional help if your dog shows anxiety, aggression, or resistance during nail trims. Handling nails on a dog that is uncooperative raises the risk of injury to both you and your pet. Professionals, such as groomers or veterinarians, use specialized techniques and may offer sedation to create a calm and safe environment for nail care. This approach is especially important if your dog does not like having its paws touched or has a history of panicking during trims.
Another clear signal to see a professional is if your dog’s nails have grown excessively long or if you’re unsure about where the quick ends. The quick contains blood vessels and nerves, so cutting into it causes pain and bleeding. To avoid this, a vet or groomer’s expertise can guide safer trimming and prevent injury. Notice any signs of infection, swelling, or unusual discoloration around the nails? Visiting a veterinarian is the safest way to handle these complications effectively.
Unsure about your dog’s nail length or how often to trim? Consulting a professional is a good idea. Regular trims are necessary, typically every 3 to 4 weeks, but your dog’s activity level and nail growth may require adjustments. Groomers and vets can assess your dog’s specific needs and recommend the best schedule. Their experience ensures that the nails stay at a comfortable length, which helps avoid paw discomfort and gait changes.
In terms of cost, professional nail trimming usually ranges from $15 to $30 per session at groomers, with vet clinics sometimes charging more due to additional medical services or sedation. The time needed per session can vary from 15 to 30 minutes depending on the dog’s behavior and nail condition. When sedation is required, expect a brief health check and monitoring before and after the grooming, which may increase both time and cost. Knowing what to expect during the visit helps reduce stress for both you and your dog.
For difficult dogs or complicated nails, professionals use tools designed for thicker, tougher nails and apply handling techniques to keep the dog comfortable and restrained safely. They also can manage dewclaws, which need special attention due to their location. Large dogs, nervous dogs, or those with medical issues affecting their nails need careful trimming, and these experts know how to do it safely without causing harm.
When trimming at home feels overwhelming, or your dog’s nails have reached a point where they are curling or damaging paw pads, book an appointment with a groomer or vet. Doing so ensures proper care, reduces the chance of injury, and builds your confidence in managing your dog’s nail health long term.
Step-by-Step Action Plan to Manage Your Dog’s Nail Length
Keep your dog’s nails at a healthy length by following this simple schedule and checking key signs along the way.
- Day 1: Examine your dog’s nails closely. Look to see if they touch the floor when your dog stands. If they do, the nails are too long.
- Day 2: Gather your trimming tools. Choose a sharp clipper or grinder suited to your dog’s nail size. This ensures a clean cut without splintering.
- Before trimming: Handle your dog’s paws gently to get them used to the process. Watch for signs of stress or discomfort.
- Day 3 or 4: Trim just the tip of each nail, avoiding the quick. Stop if you see a pink area or bleeding, which shows you cut too far.
- Weekly: Check for nail length and any signs your dog is uncomfortable or changing its walking. Nail growth varies, so adjust trimming frequency as needed.
- Monthly: Inspect dewclaws and trim them if they grow too long, since these nails don’t wear down naturally.
- Every checkup: If you notice persistent limp, nail cracks, or aggressive behavior when paws are touched, book a vet or groomer appointment.
Frequently Asked Questions
How Can You Tell If Your Dog’s Nails Are Causing Pain?
If your dog limps or walks gingerly, their nails may be too long. Pain often arises when nails hit hard surfaces, increasing discomfort during movement.
What Signs Suggest a Dog’s Nails Are Prone to Splitting or Injury?
Long nails tend to split or splinter, exposing the quick and causing pain. Check for cracks or irregular edges that might catch on carpets or blankets.
How Do Long Nails Affect a Dog’s Balance on Smooth Floors?
Dogs with long nails often slip or move cautiously on hardwood or tile floors. This altered gait helps them avoid discomfort but indicates nails need trimming.
When Do Puppies Differ from Adult Dogs in Nail Trimming Frequency?
Puppies might need nail trims every 4-6 weeks, while adult dogs usually trim every 6-8 weeks. Growth rates and activity levels influence these schedules.
Can Long Nails Contribute to Joint Pain or Arthritis in Dogs?
Yes, the pressure from long nails affects joint alignment and can cause inflammation. Constant clicking on floors also adds stress to the joints over time.
What Are Dewclaws and Why Do They Need Special Nail Care?
Dewclaws are extra nails higher on the leg that don’t touch the ground but still need trimming. They can overgrow and curl, causing pain or infections.
Key Points to Remember
Watching your dog’s nail length closely helps prevent many health and comfort issues. Start by checking their nails during your next walk and schedule regular trims to keep them comfortable. Make a habit of observing how your dog walks and reacts to paw handling to catch problems early.


